👨‍💼Creating Profile Settings

profile setting

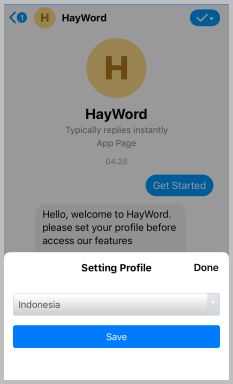
In this flow, we will retrieve the user's native language information for the translate feature.

Connecting Firebase with Applications#

before we retrieve user information, we must first create a database where the information is stored, and here we will use firebase as the database.

  1. Go to console firebase page, make sure you are logged in with a google account.

  2. Click 'Create a Project' button.

    Show Details
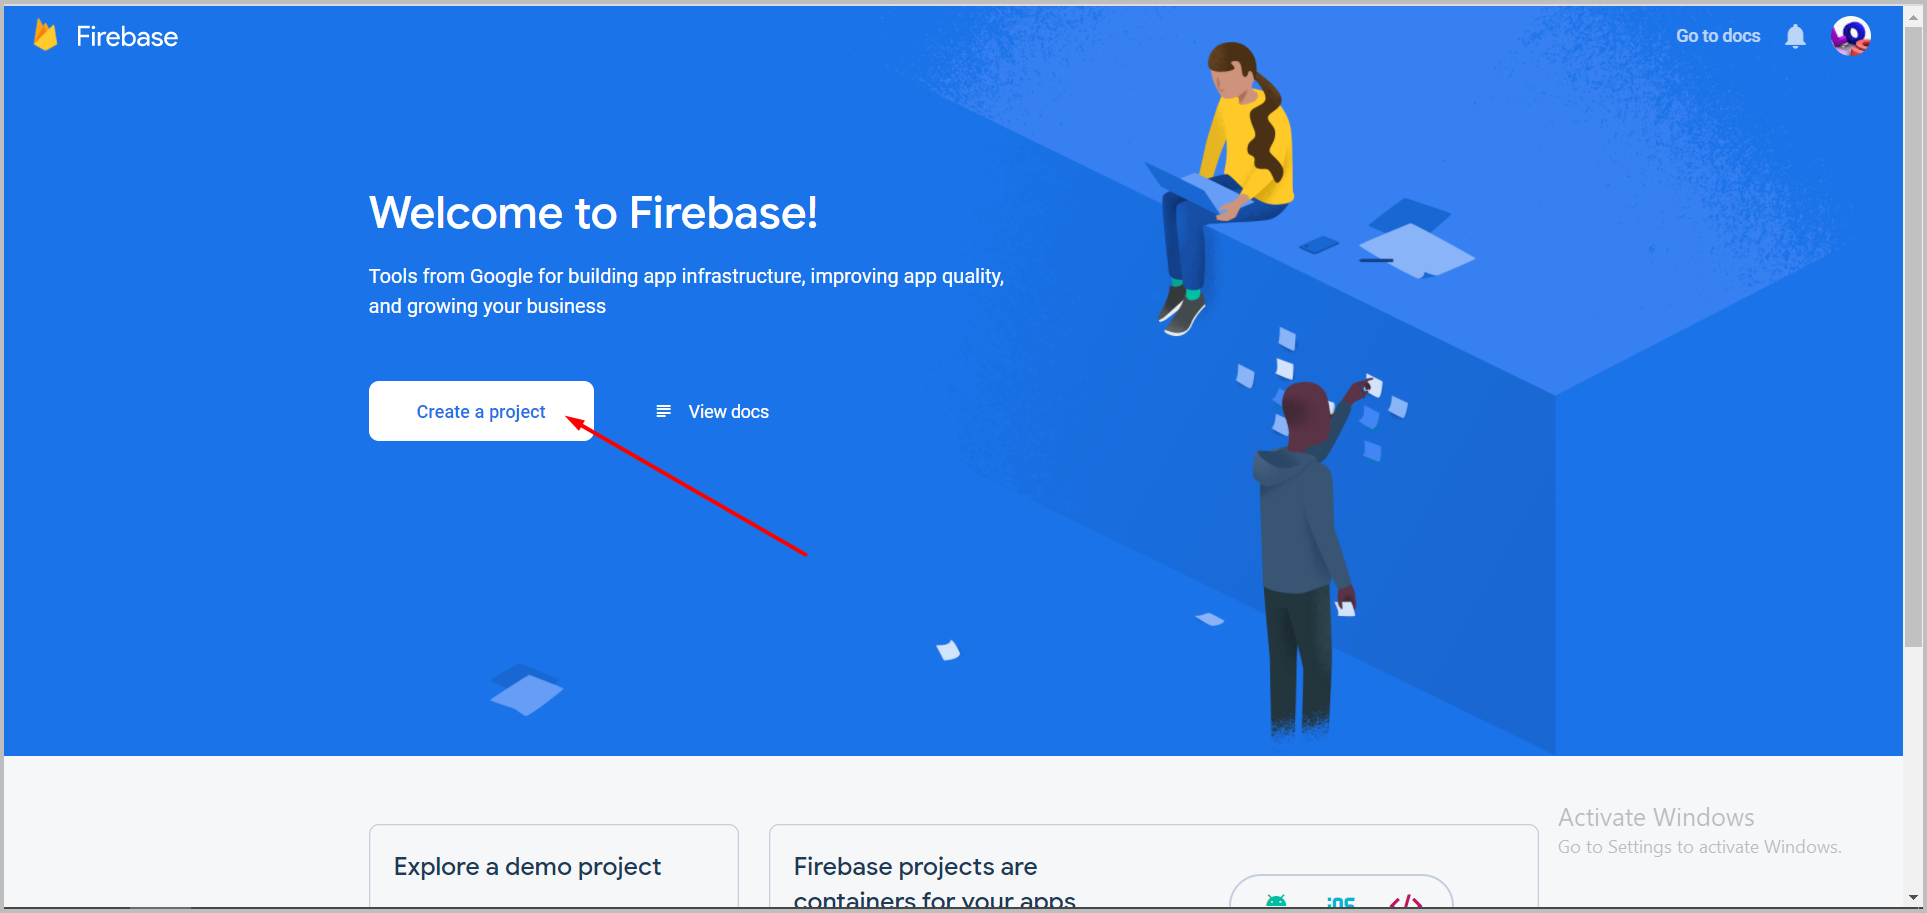
    create firebase project

  3. Fill in the project data as you wish, and don't forget to check 'I accept the Firebase terms', then click 'continue'.

    Show Details
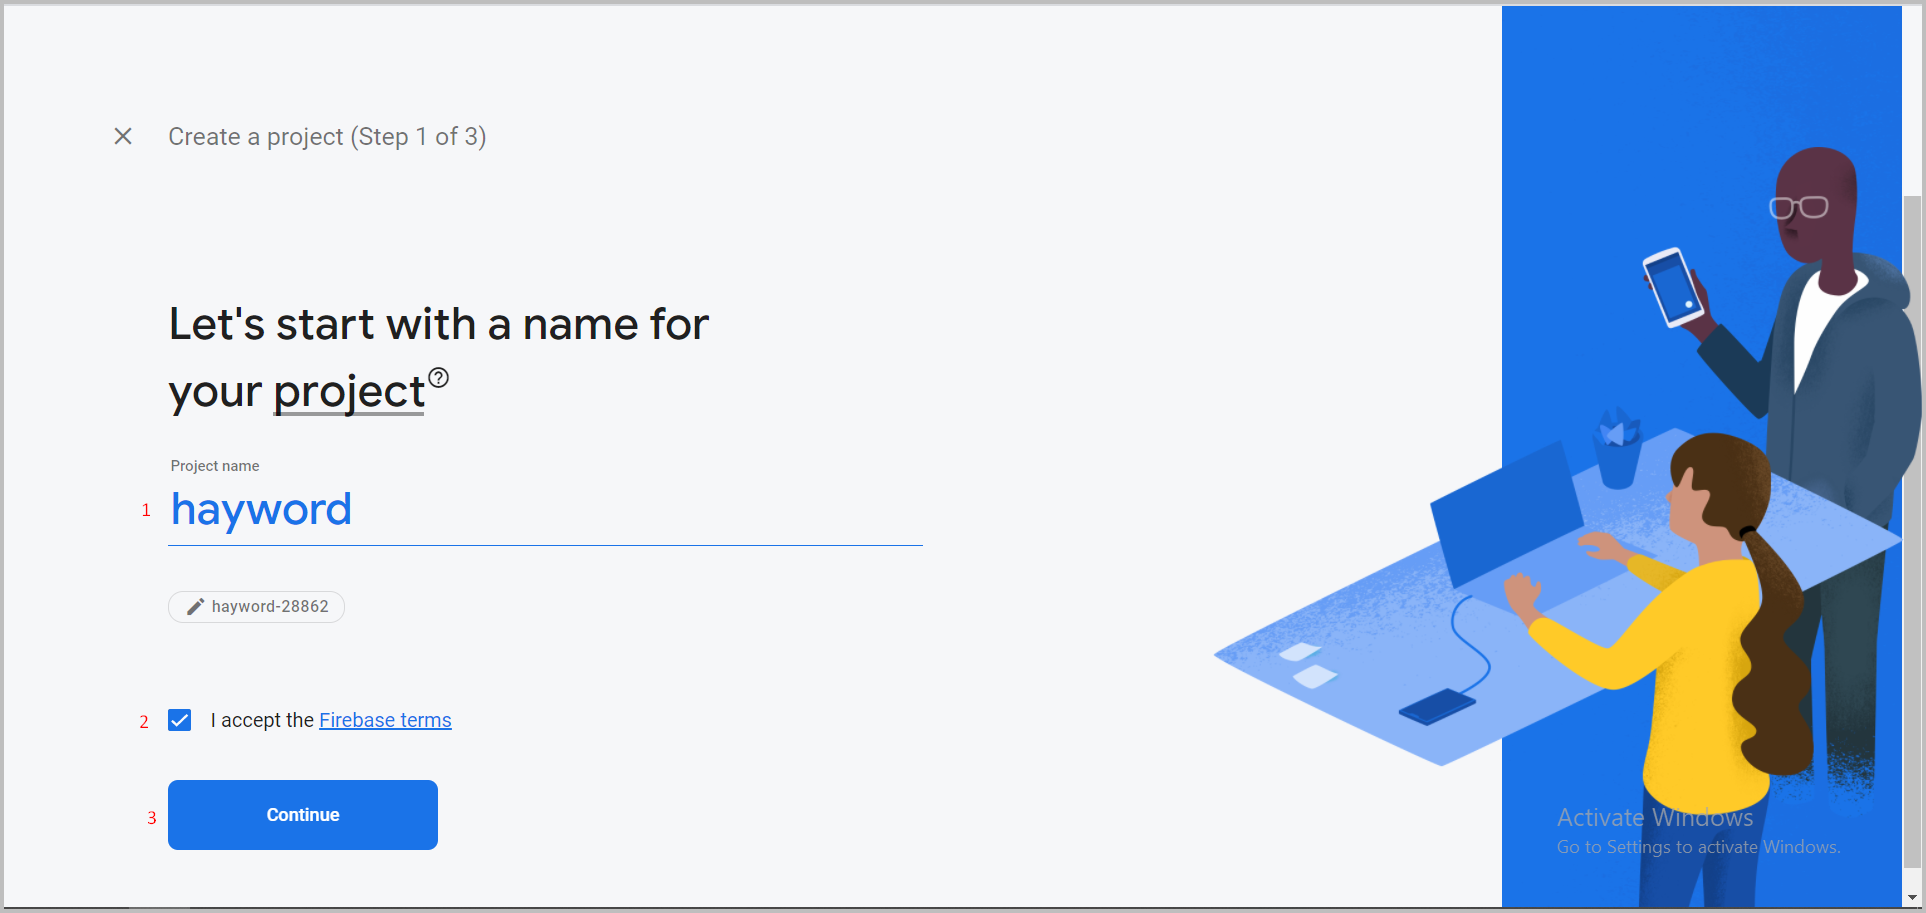
    fill in firebase project data

  4. In step 2, disable 'Enable Google Analytics for this project' because you don't need it for this project, then click 'Continue'.

    Show Details
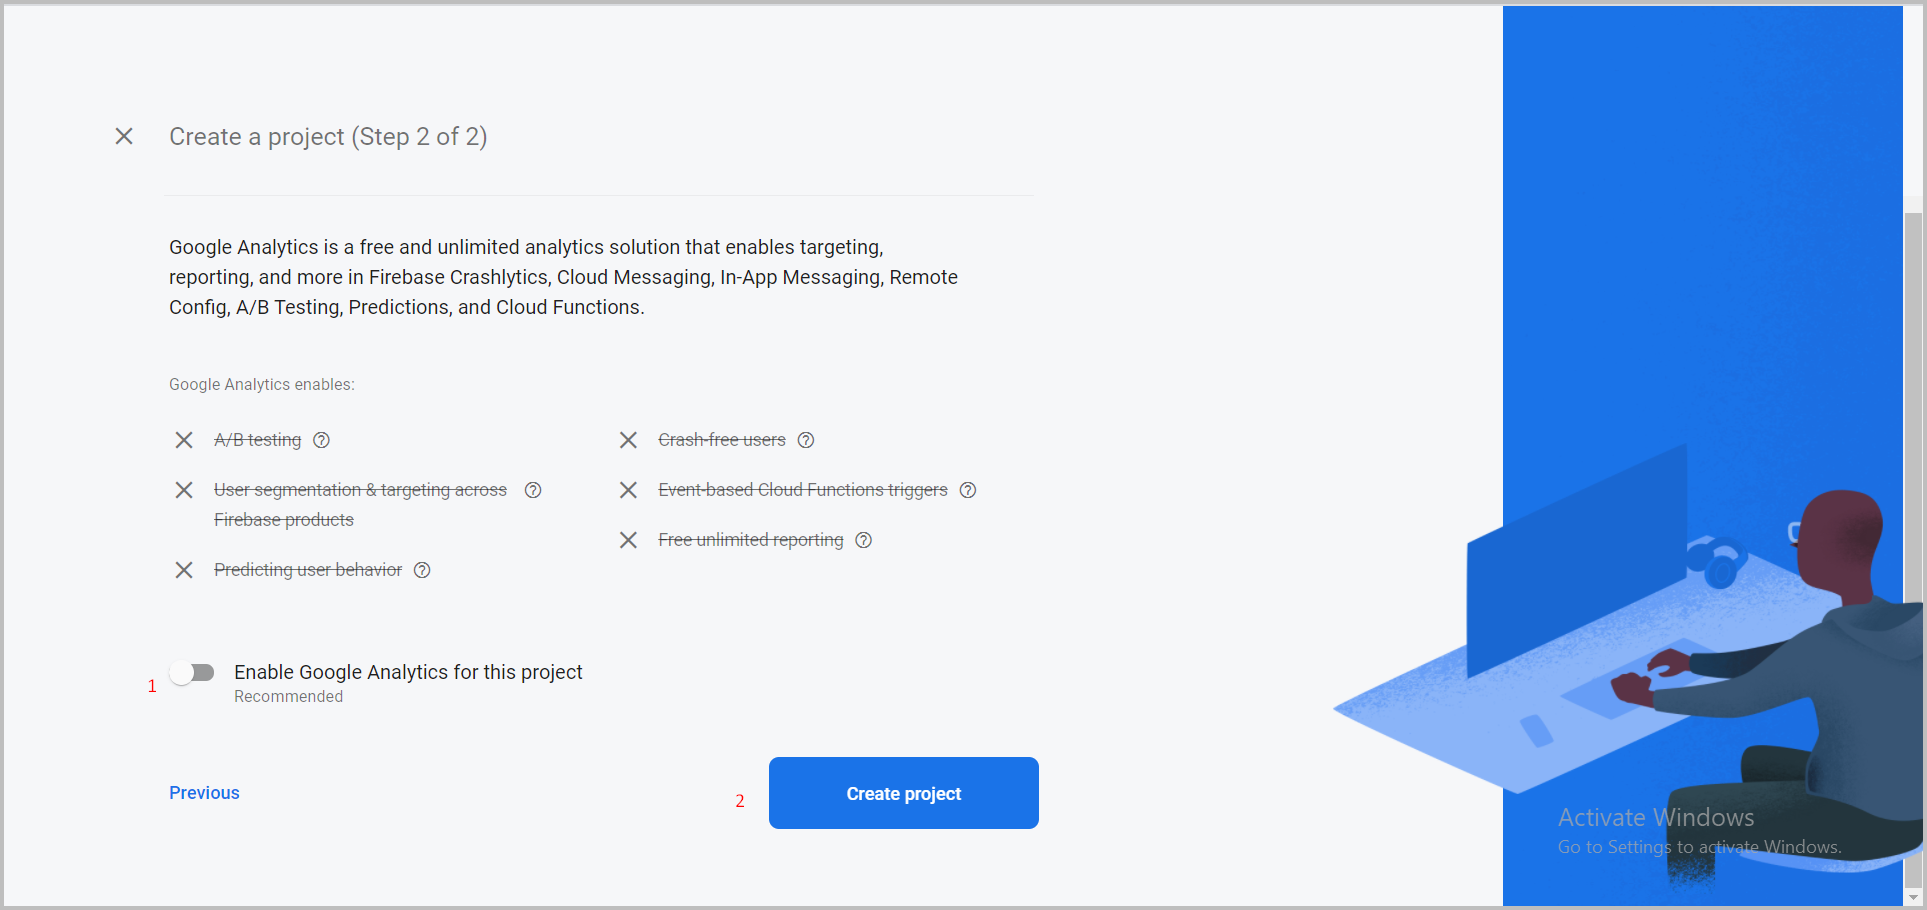
    step 2 firebase project

  5. After the project is successfully created> click 'Continue' button.

    Show Details
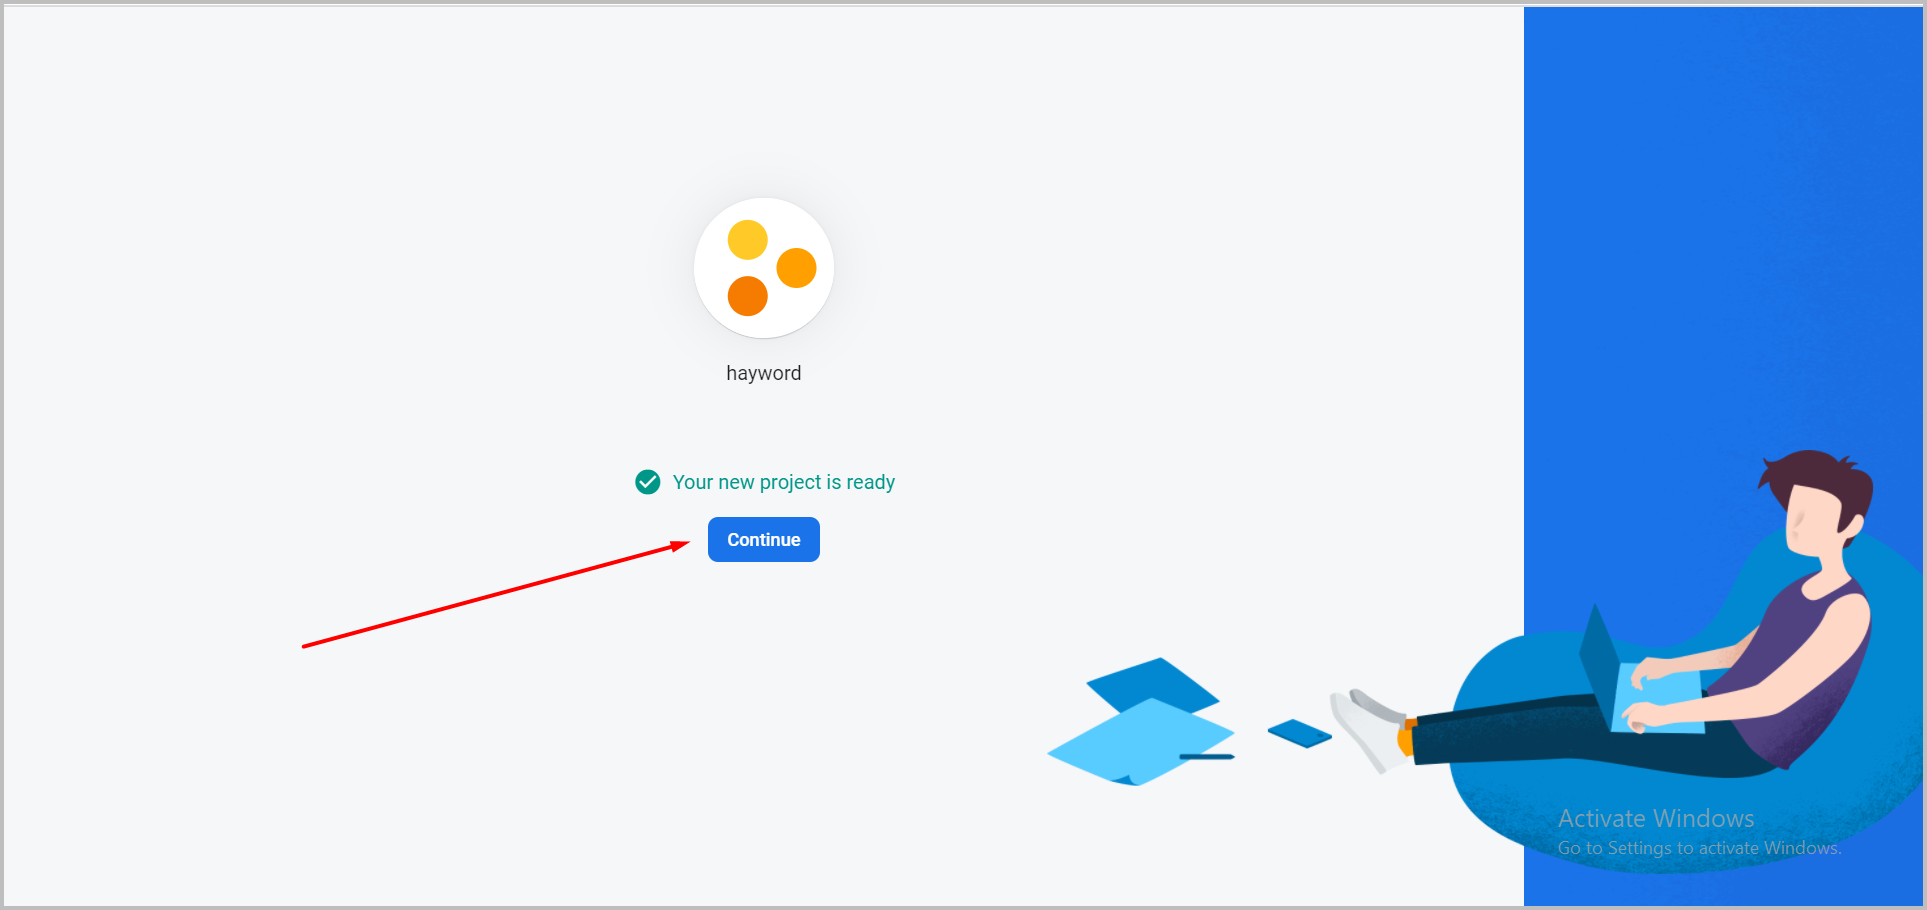
    firebase project was created

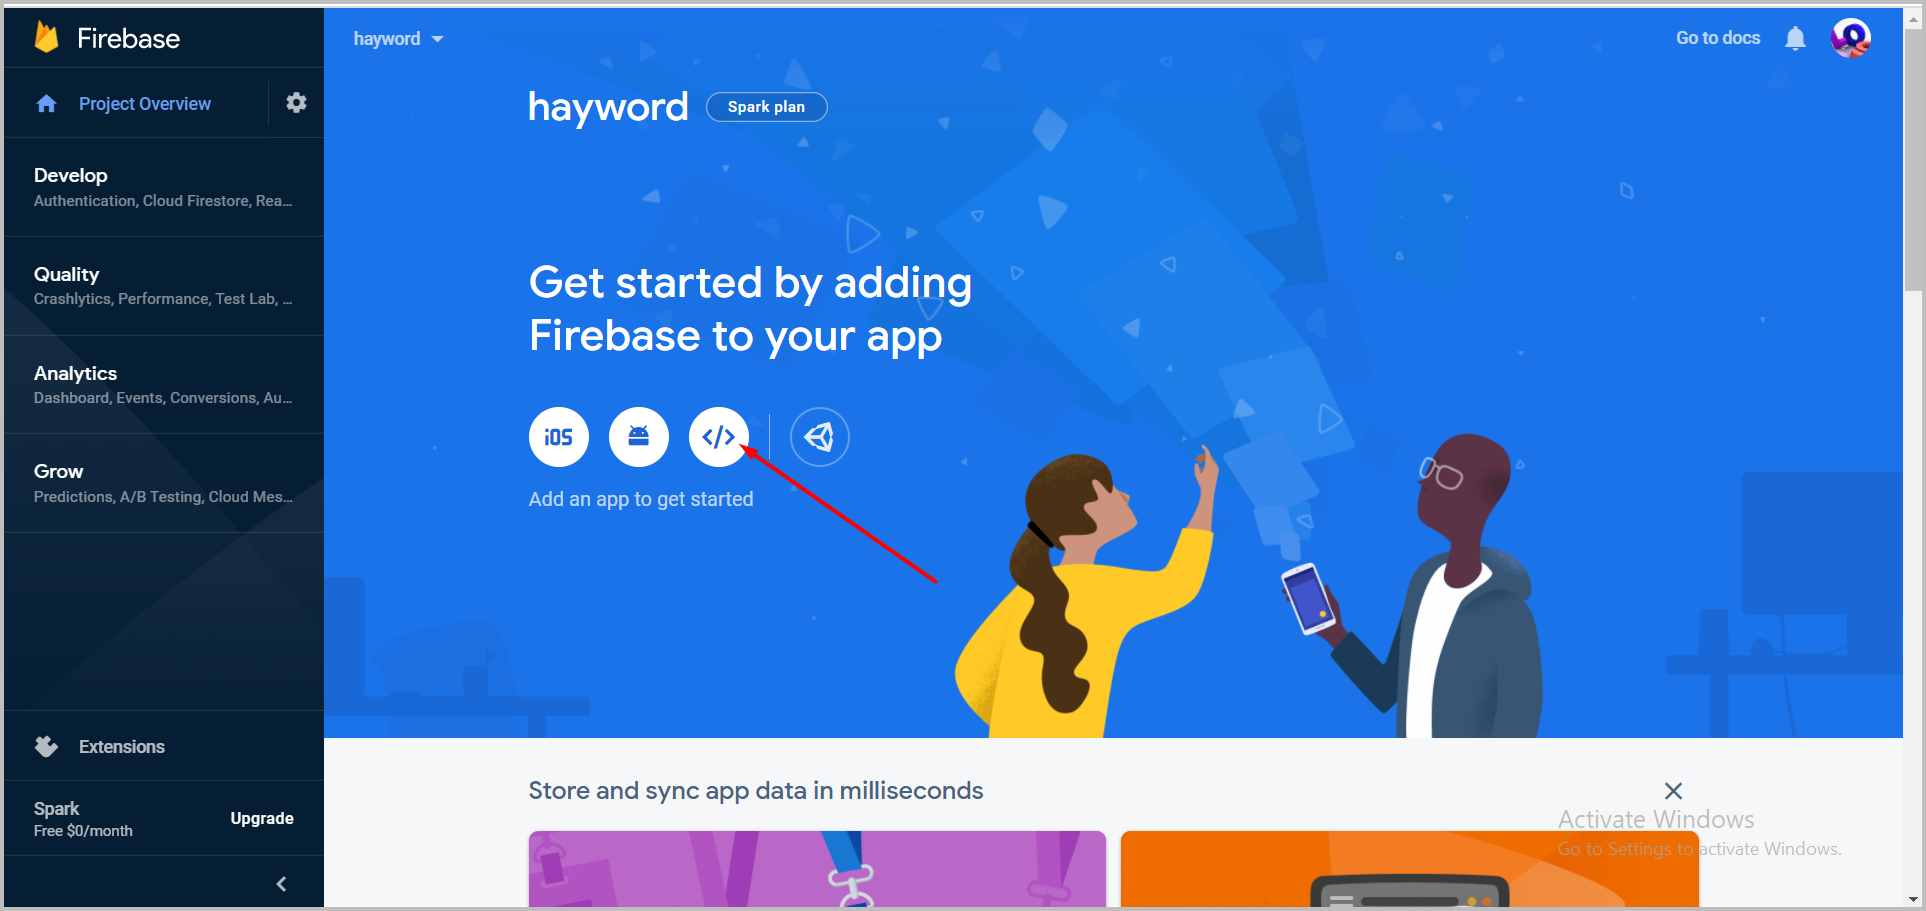
  6. Click the </> button on 'add an app to get started'.

    Show Details

    add app to firebase

  7. Fill in the application name> click the 'Register app' button.

    Show Details
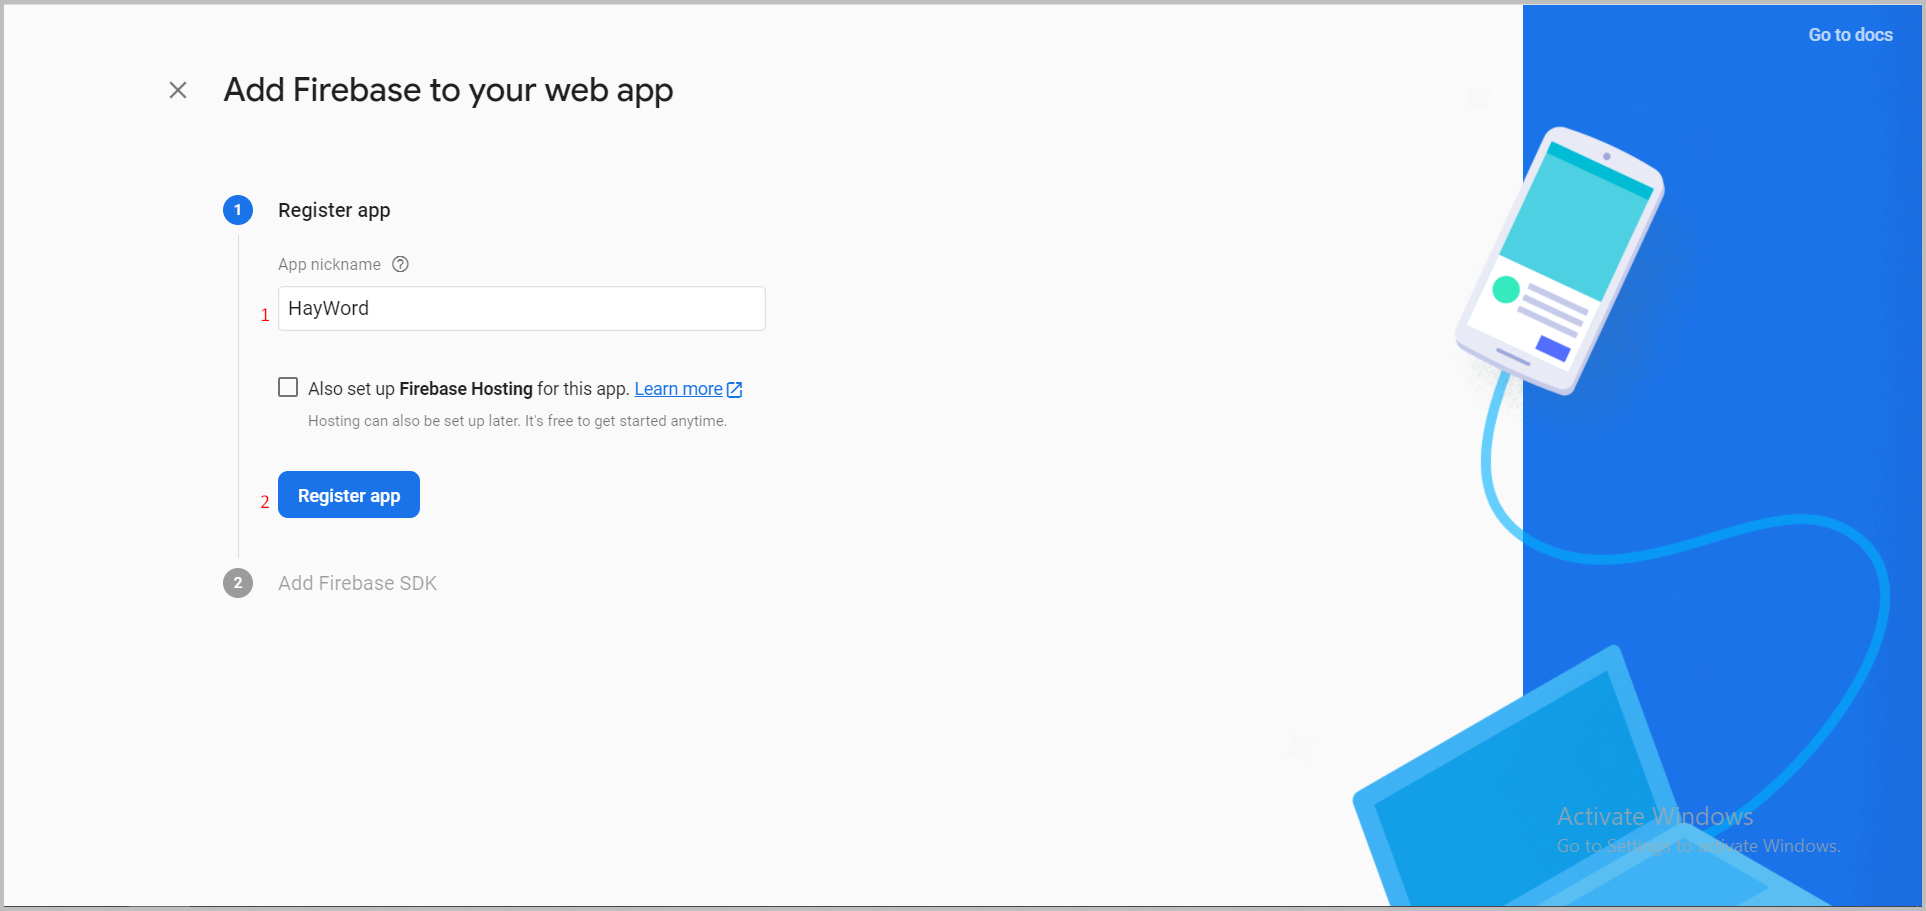
    add nickname app

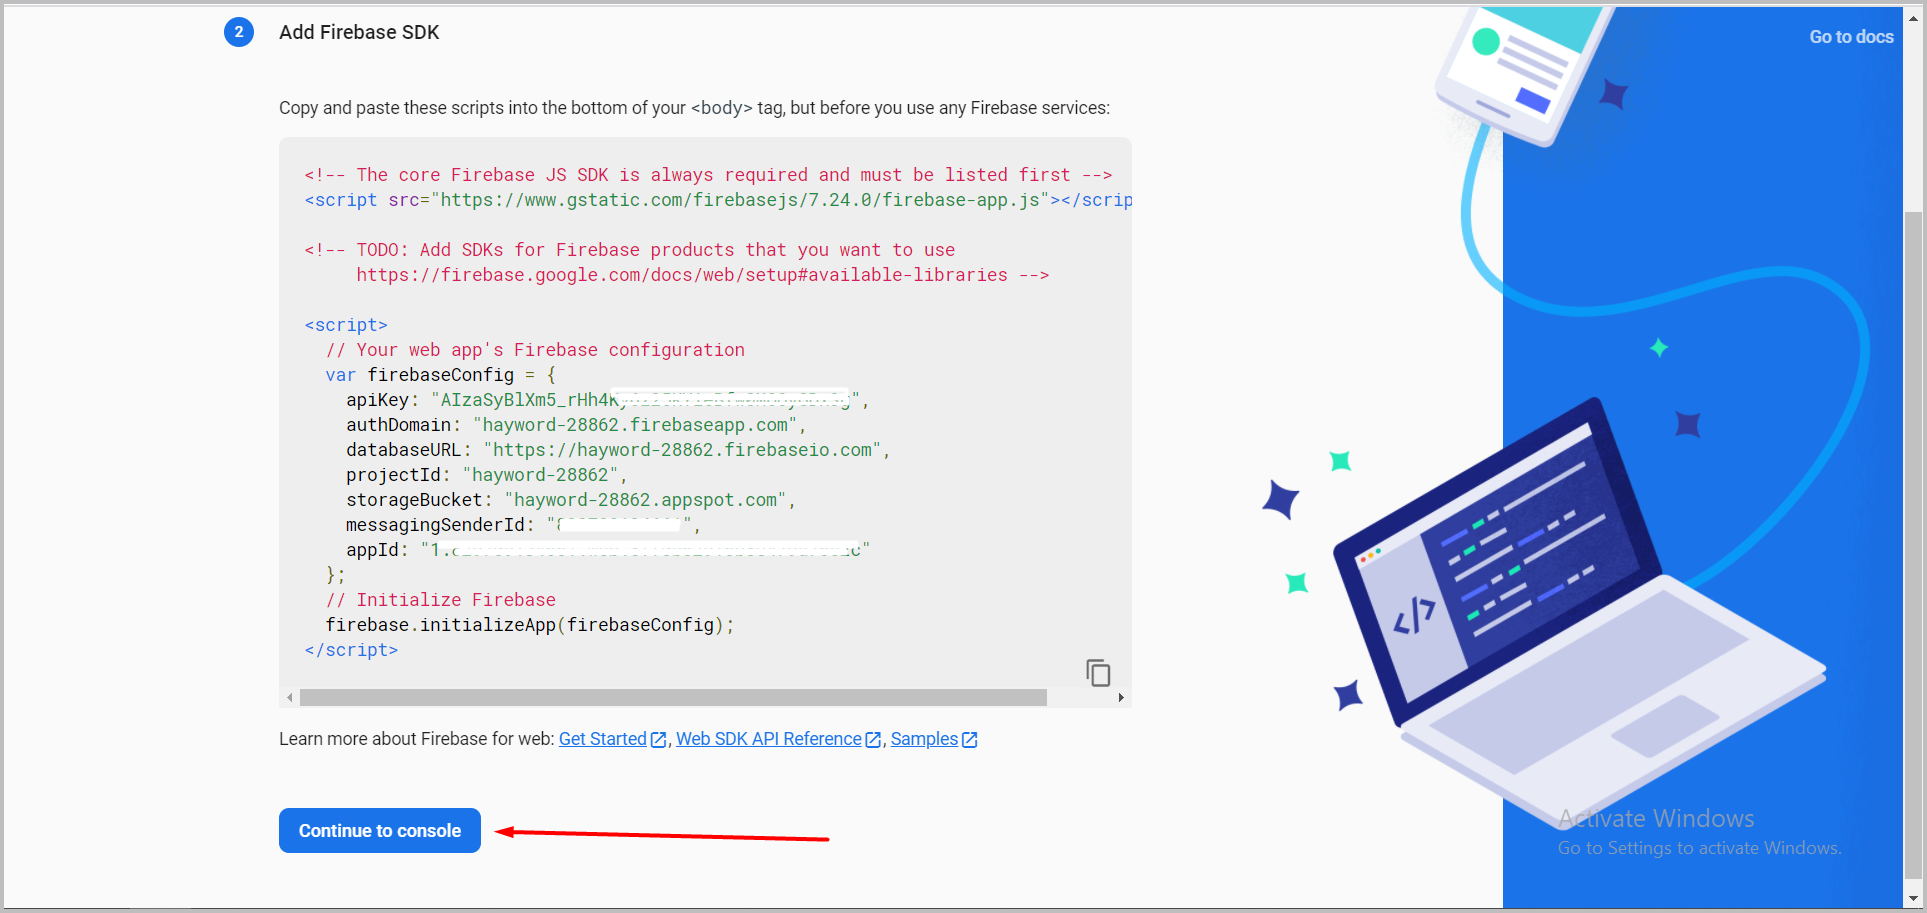
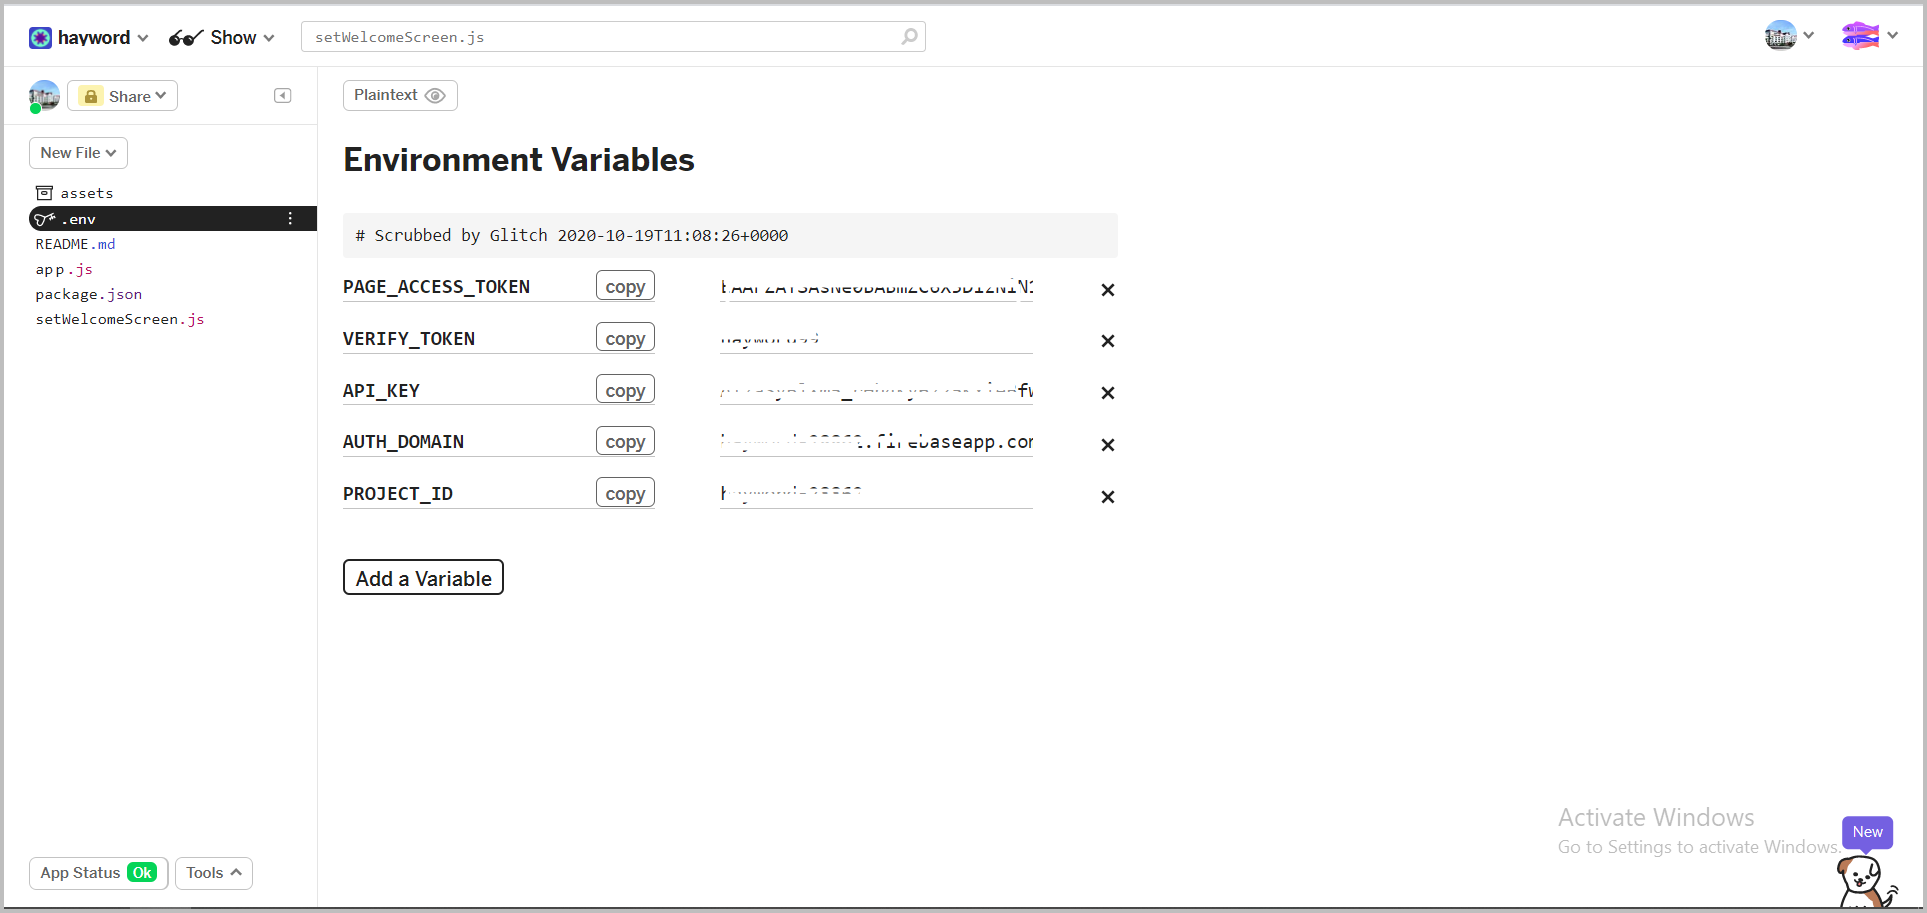
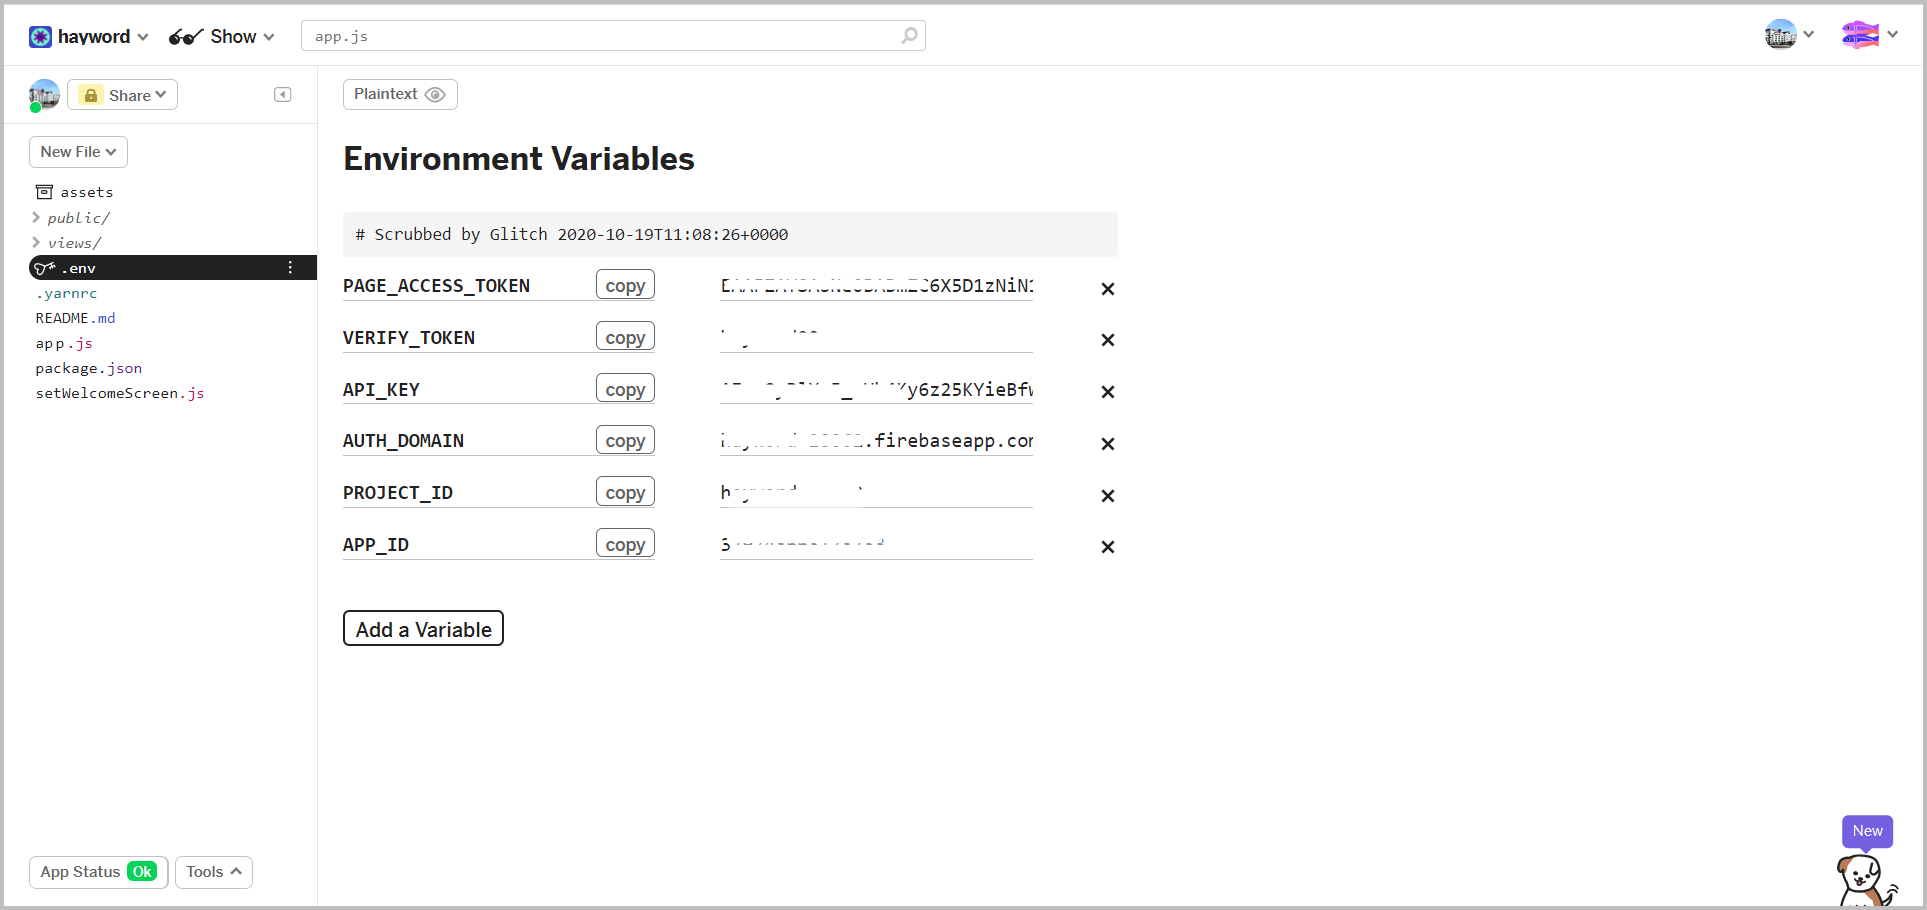
  8. Create API_KEY, AUTH_DOMAIN and PROJECT_ID variable in the .env file in the glitch and fill it according to the value obtained in firebase sdk.

    Show Details

    firebase sdkl set variable firebase

  9. After that, return to the firebase console page > select the 'Develop' menu> Cloud Firestore > click the 'Create Database' button.

    Show Details
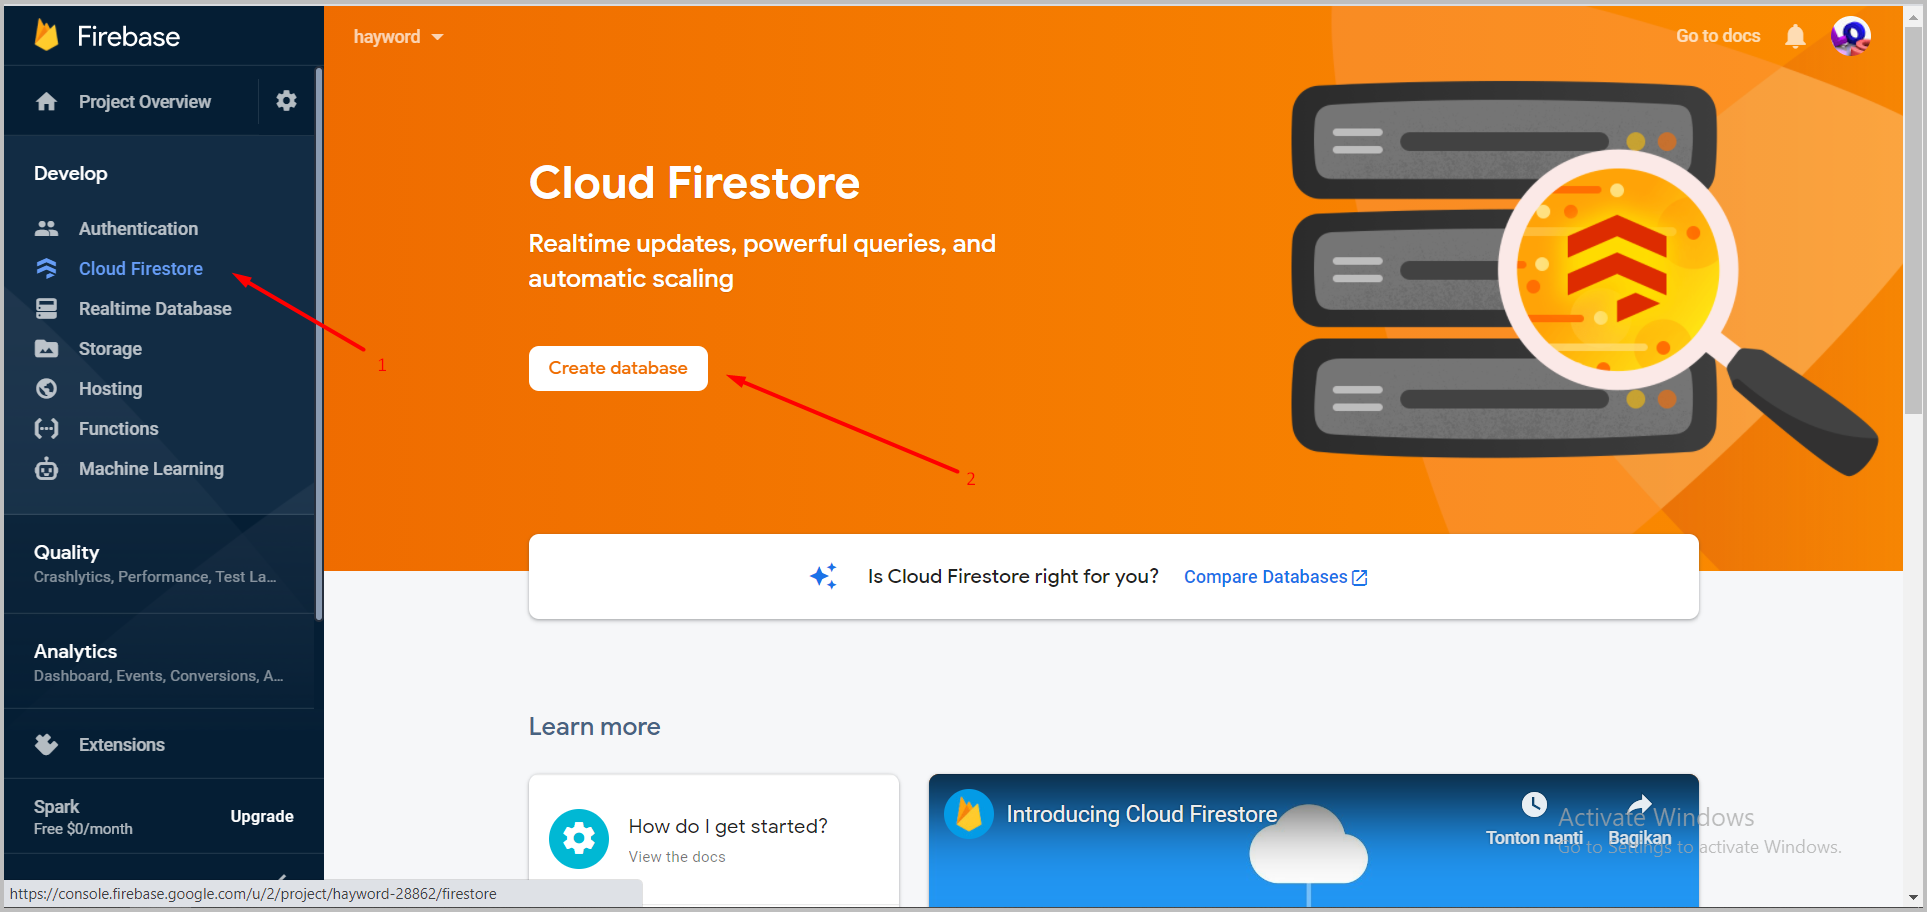
    create database

  10. In rules we select 'Test Mode'> click the 'Next' button.

  11. In the location, leave it by default > click the 'Enable' button.

    Show Details
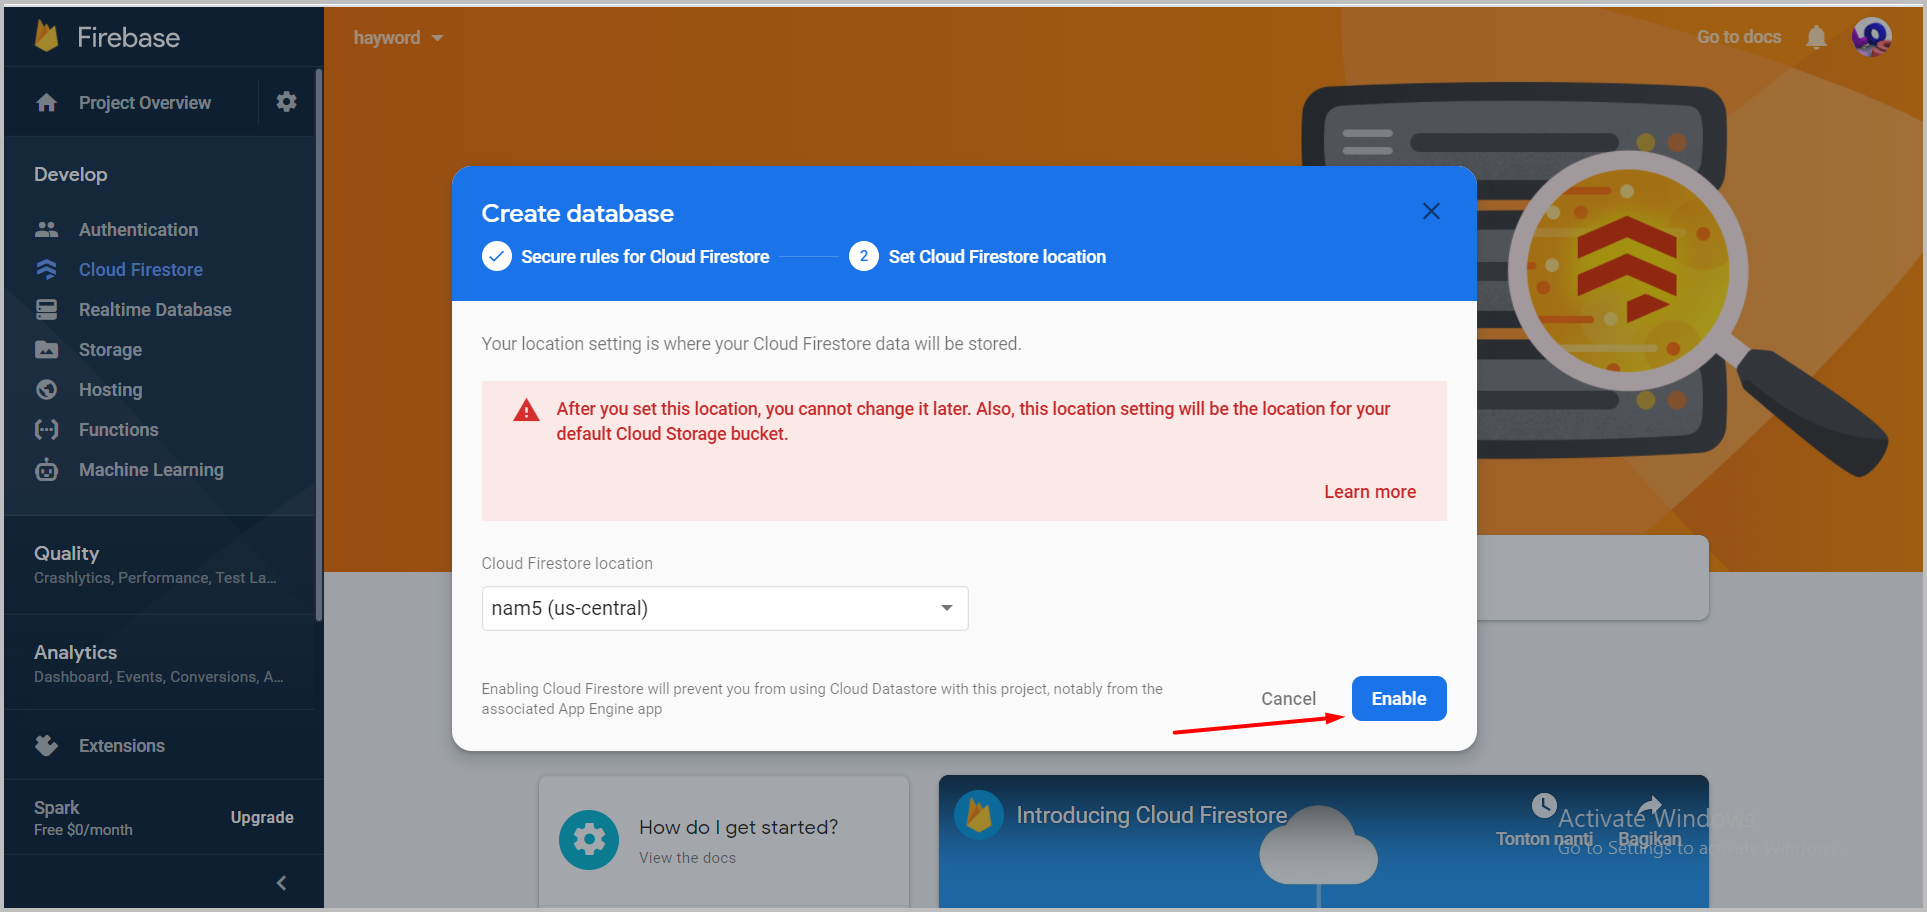
    location database

What is database? why use firebase?

A database is like a dictionary for data. So when we need information about what data it is, we search it in the dictionary and get the data information. And Firebase is like a dictionary brand. We use Firebase because It's easy to integrate with our app.

Creating a User Table in Firebase#

  1. On the left sidebar of firebase, select the 'Develop' menu> Cloud Firestore> click the 'Start Collection' button.

    Show Details
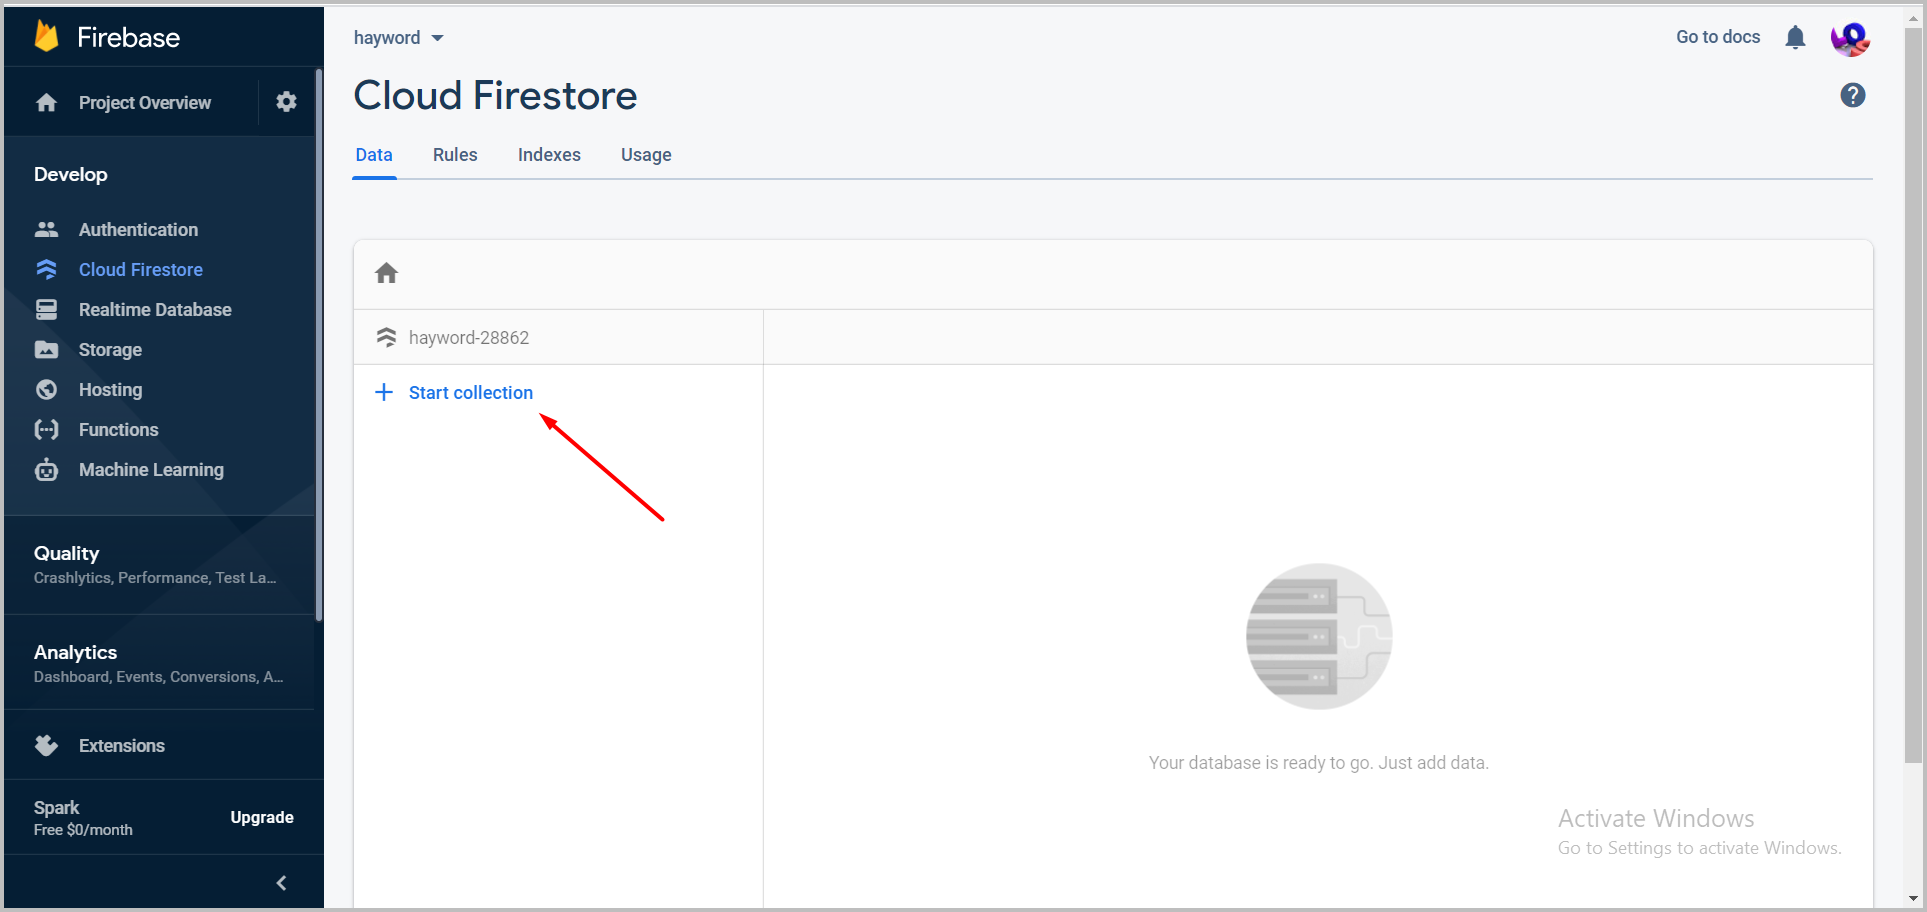
    create table

  2. Fill in the name of the collection (table) with 'users'> click 'next'.

    Show Details
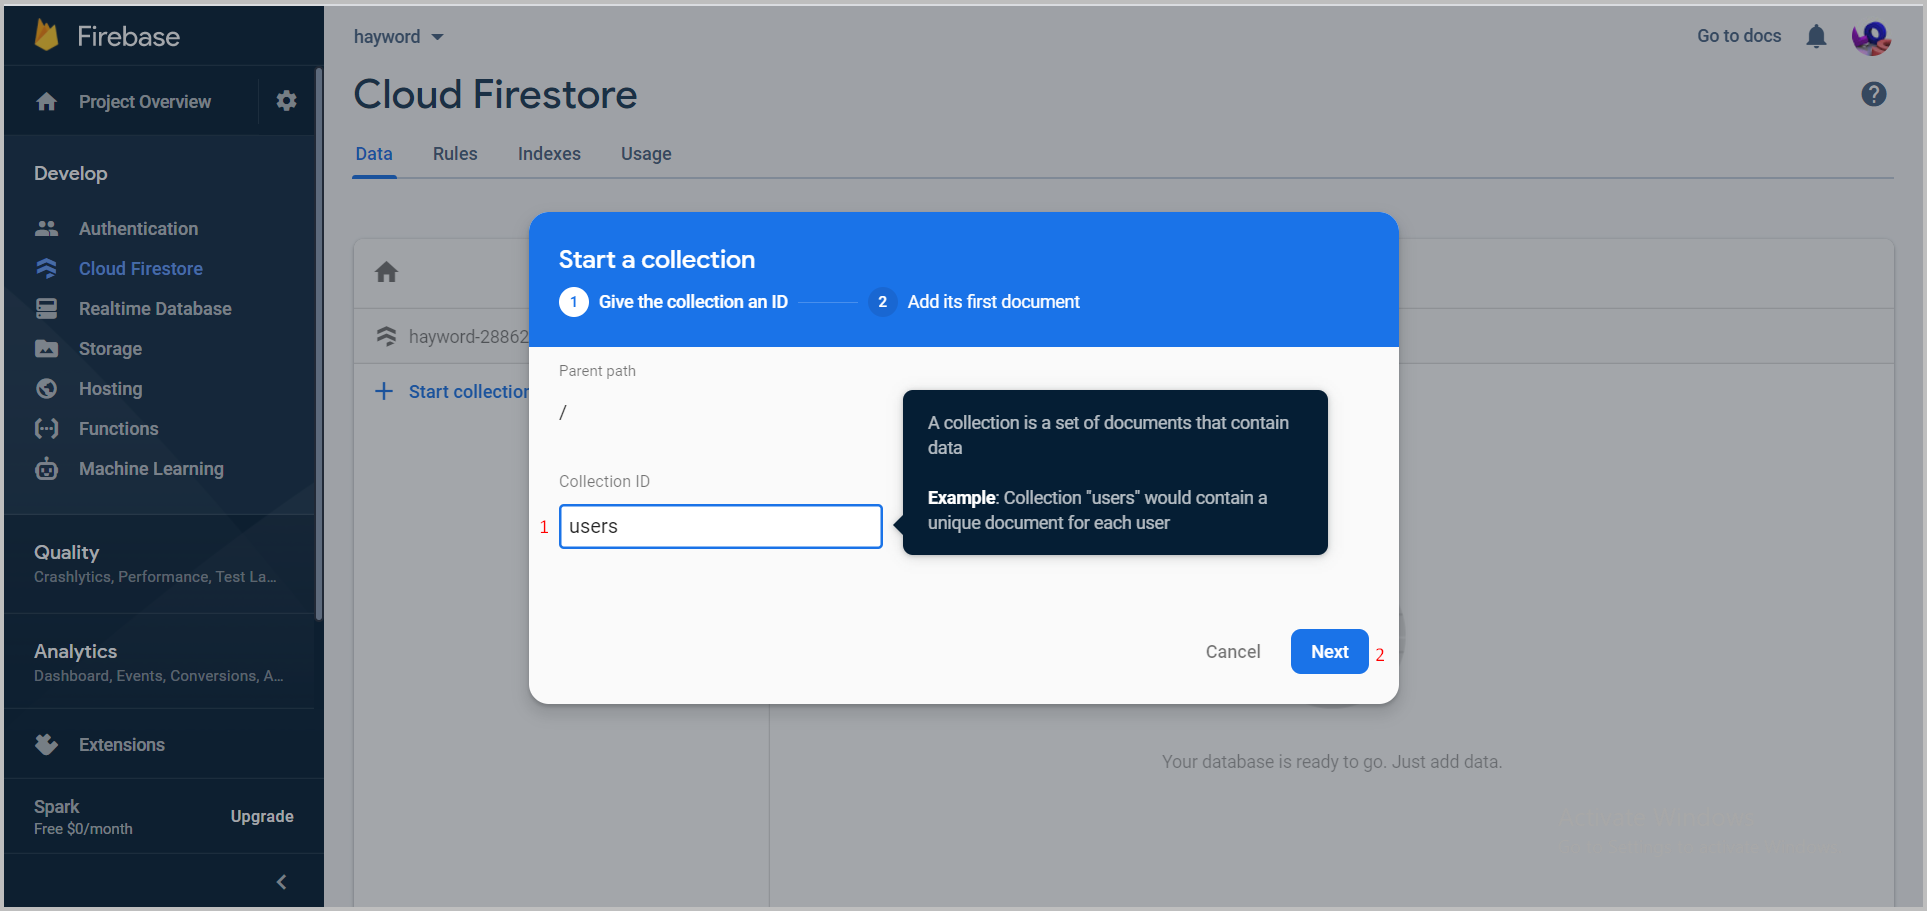
    add name to table

  3. Click 'Auto ID'> fill in the field

Field NameField Type
idstring
languagestring

and leave the value blank> click 'Save'.

Show Details
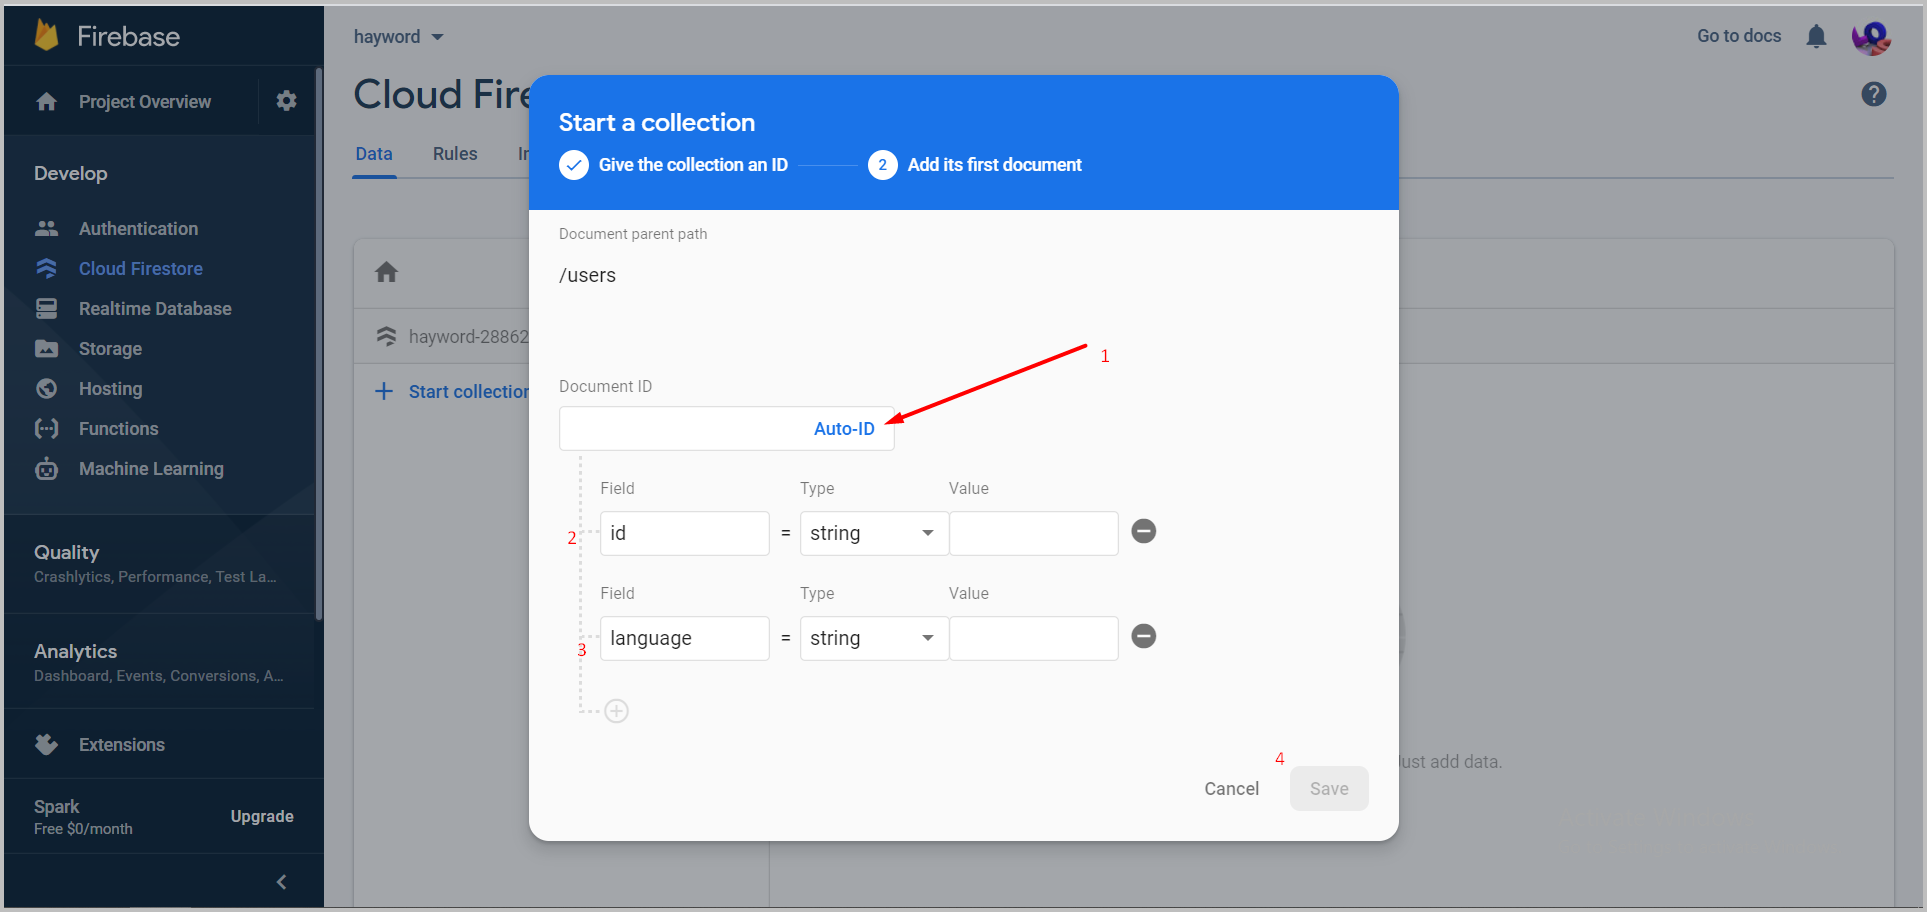
add field to table

Creating a Webview to Get User Data with ReactJS#

We will create a webview to display the user language choice form with React js.

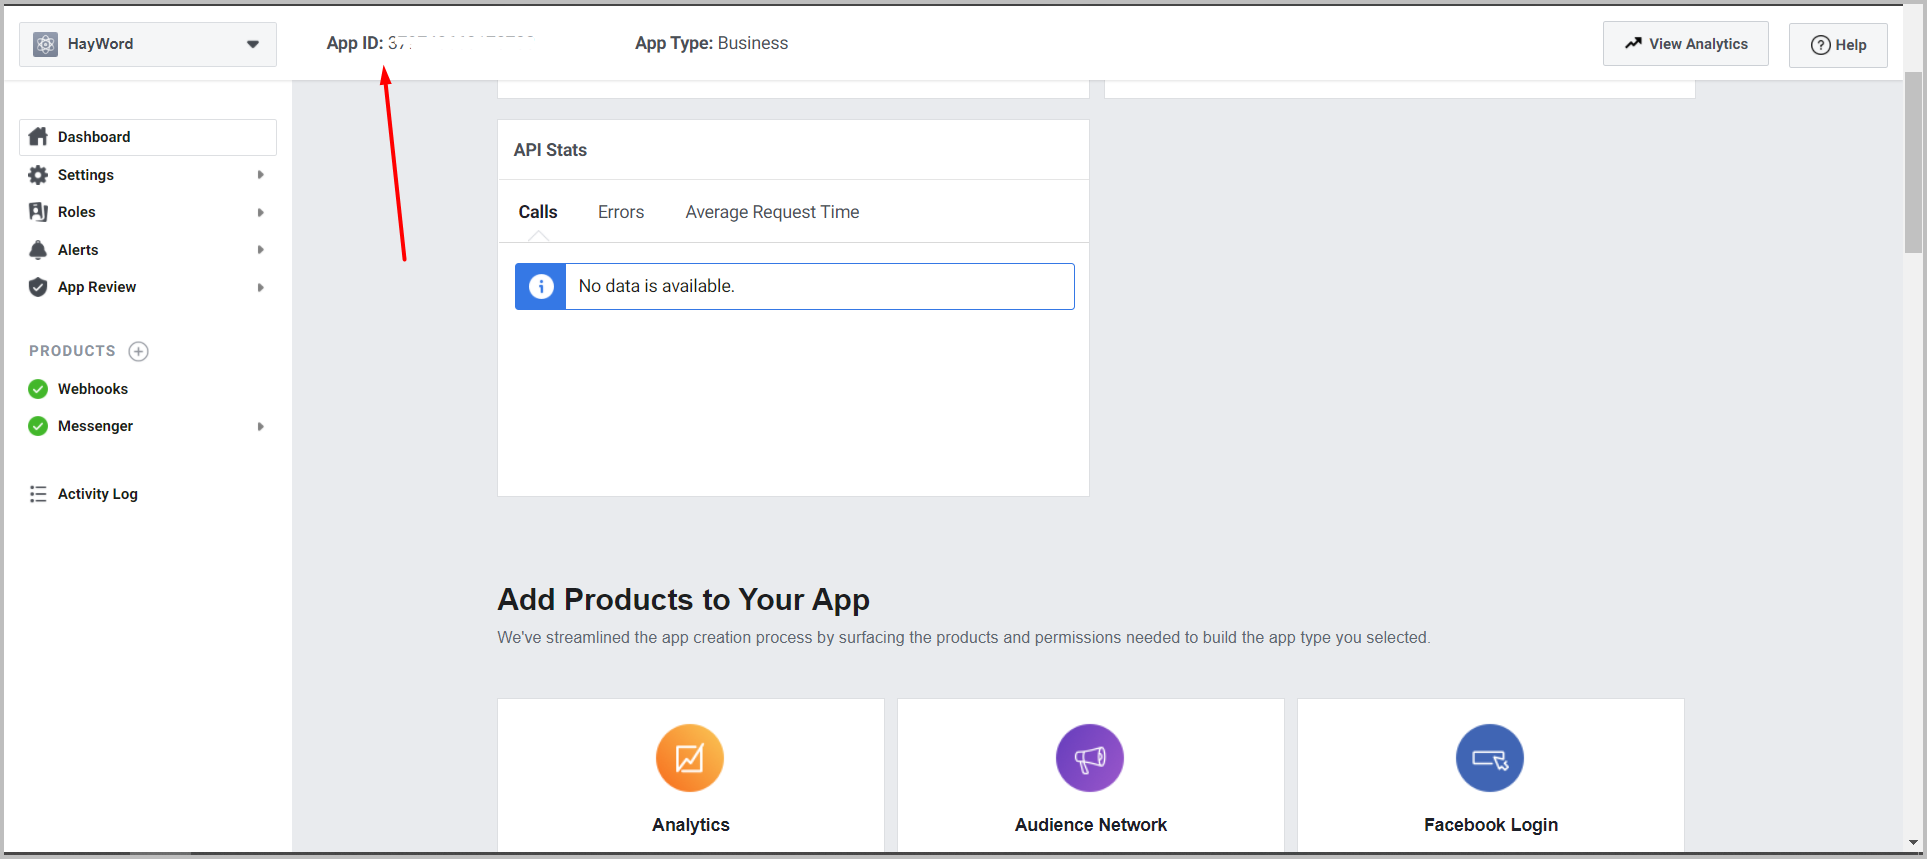
  1. Add the APP_ID variable in .env, to get the app id of our application, you can see it on the facebook developer application dashboard.

    Show Details

    get app id set app id variable

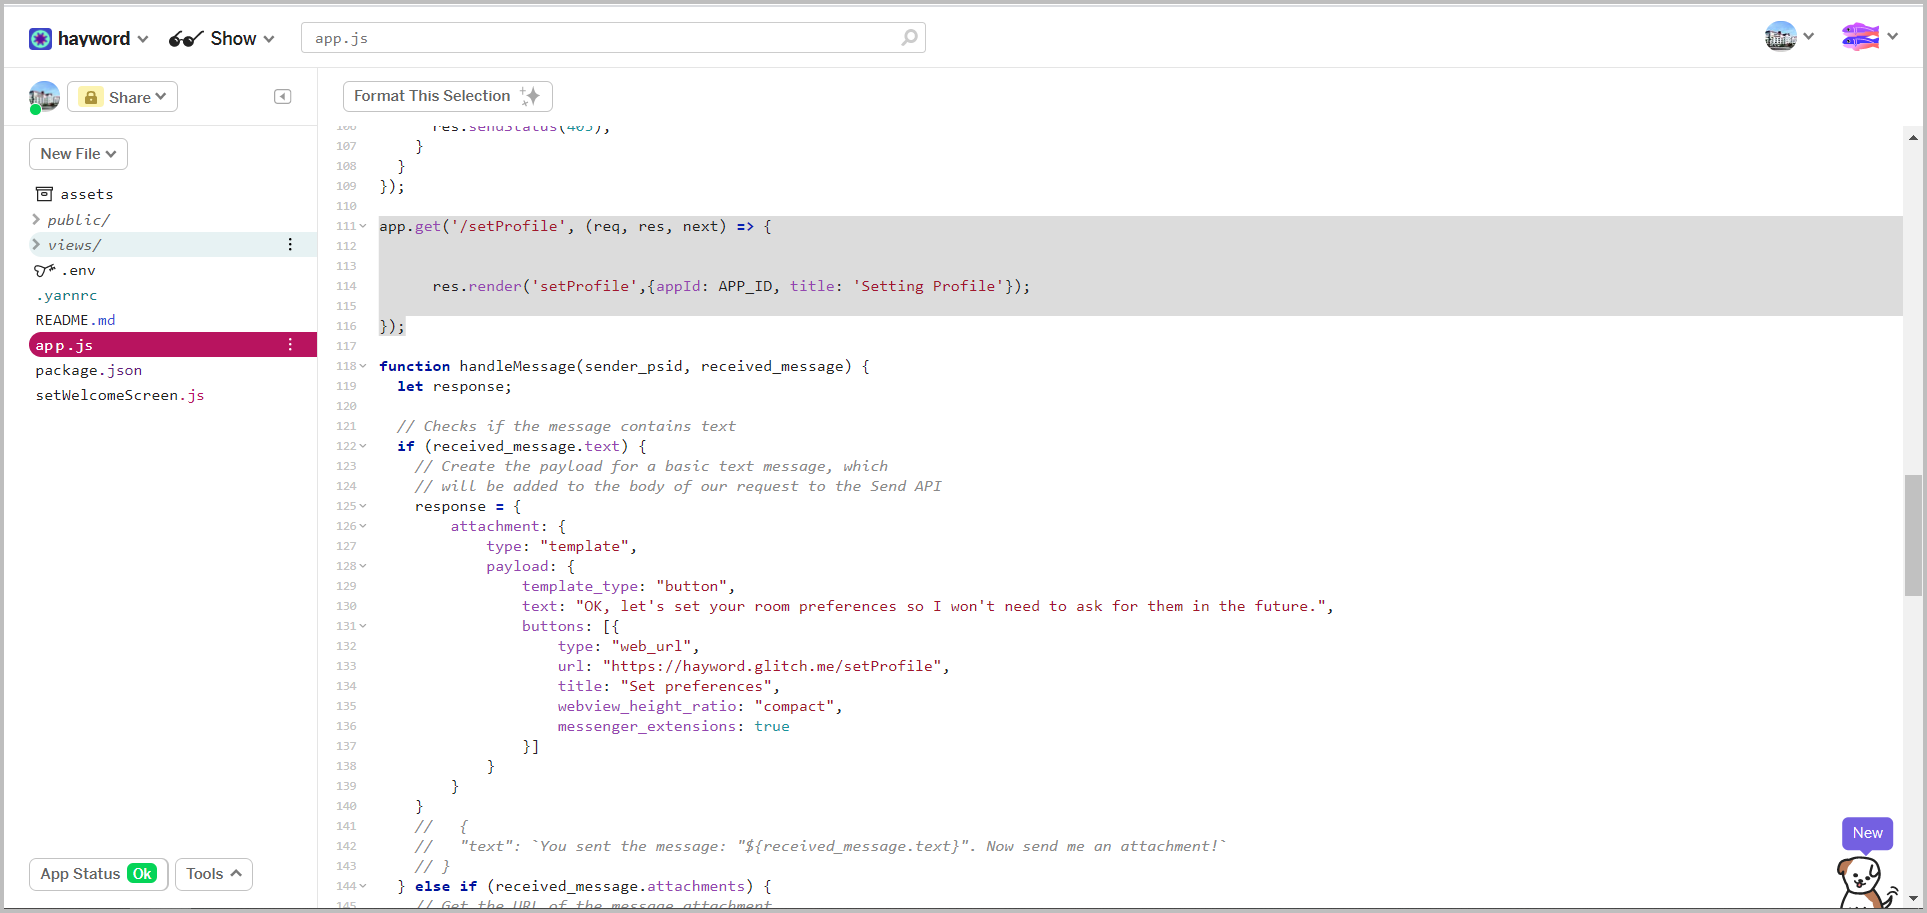
  2. Create the get /setProfile route in app.js.

    //set route with param userID
    app.get('/setProfile/:userID', (req, res, next) => {
    db.doc(`users/${req.params.userID}`).get().then((docSnapshot) => {
    //check whether the user data is already in firebase
    if(docSnapshot.exists){
    //sends the setProfile.ejs file in the views and data folder of the app id, title and language
    res.render('setProfile',{appId: APP_ID, title: 'Setting Profile', lang: docSnapshot.data().language});
    //if not, it will enter user data into firebase
    }else{
    db.collection("users").doc(`${req.params.userID}`).set({
    id: req.params.userID,
    language: "-"
    })
    .then(function() {
    res.render('setProfile',{appId: APP_ID, title: 'Setting Profile', lang:'-'});
    })
    .catch(function(error) {
    console.error("Error writing document: ", error);
    });
    }
    });
    }
    });
    Show Details

    set profile route

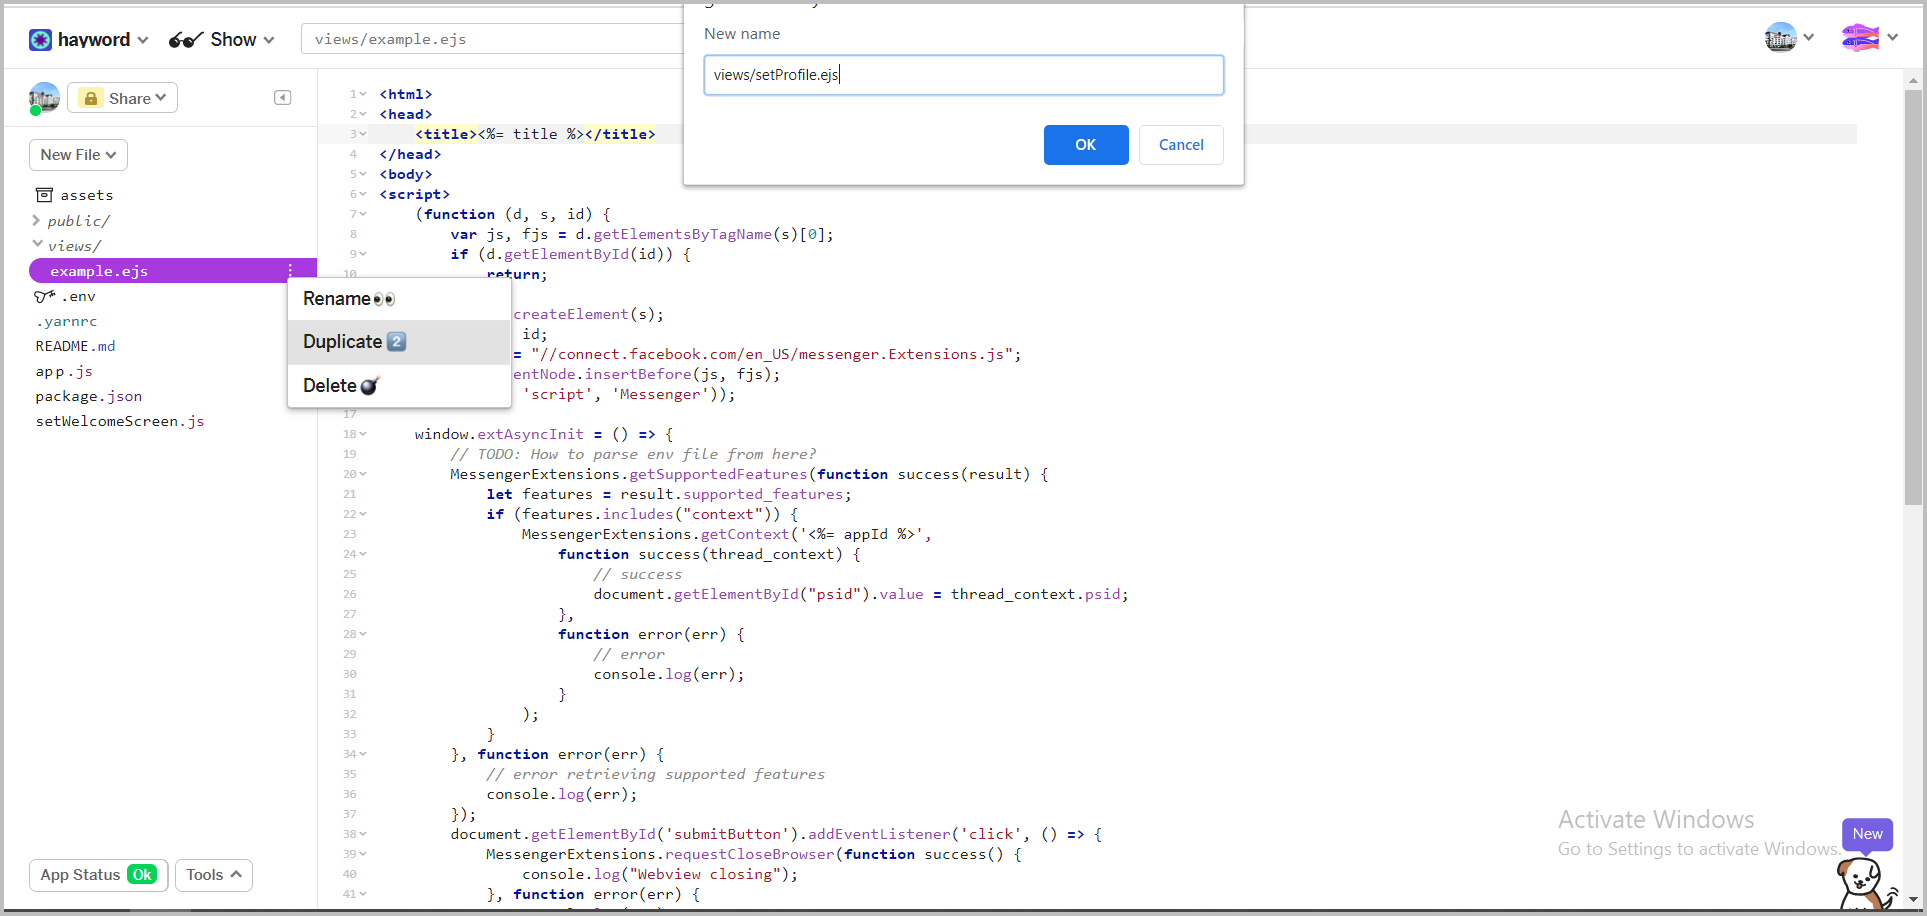
  3. Create a setProfile.ejs file in the views folder, so it's easier just to duplicate the ʻexample.ejs` file (right click on the file) then rename it to 'setProfile.ejs'.

    Show Details

    duplicate ejs file

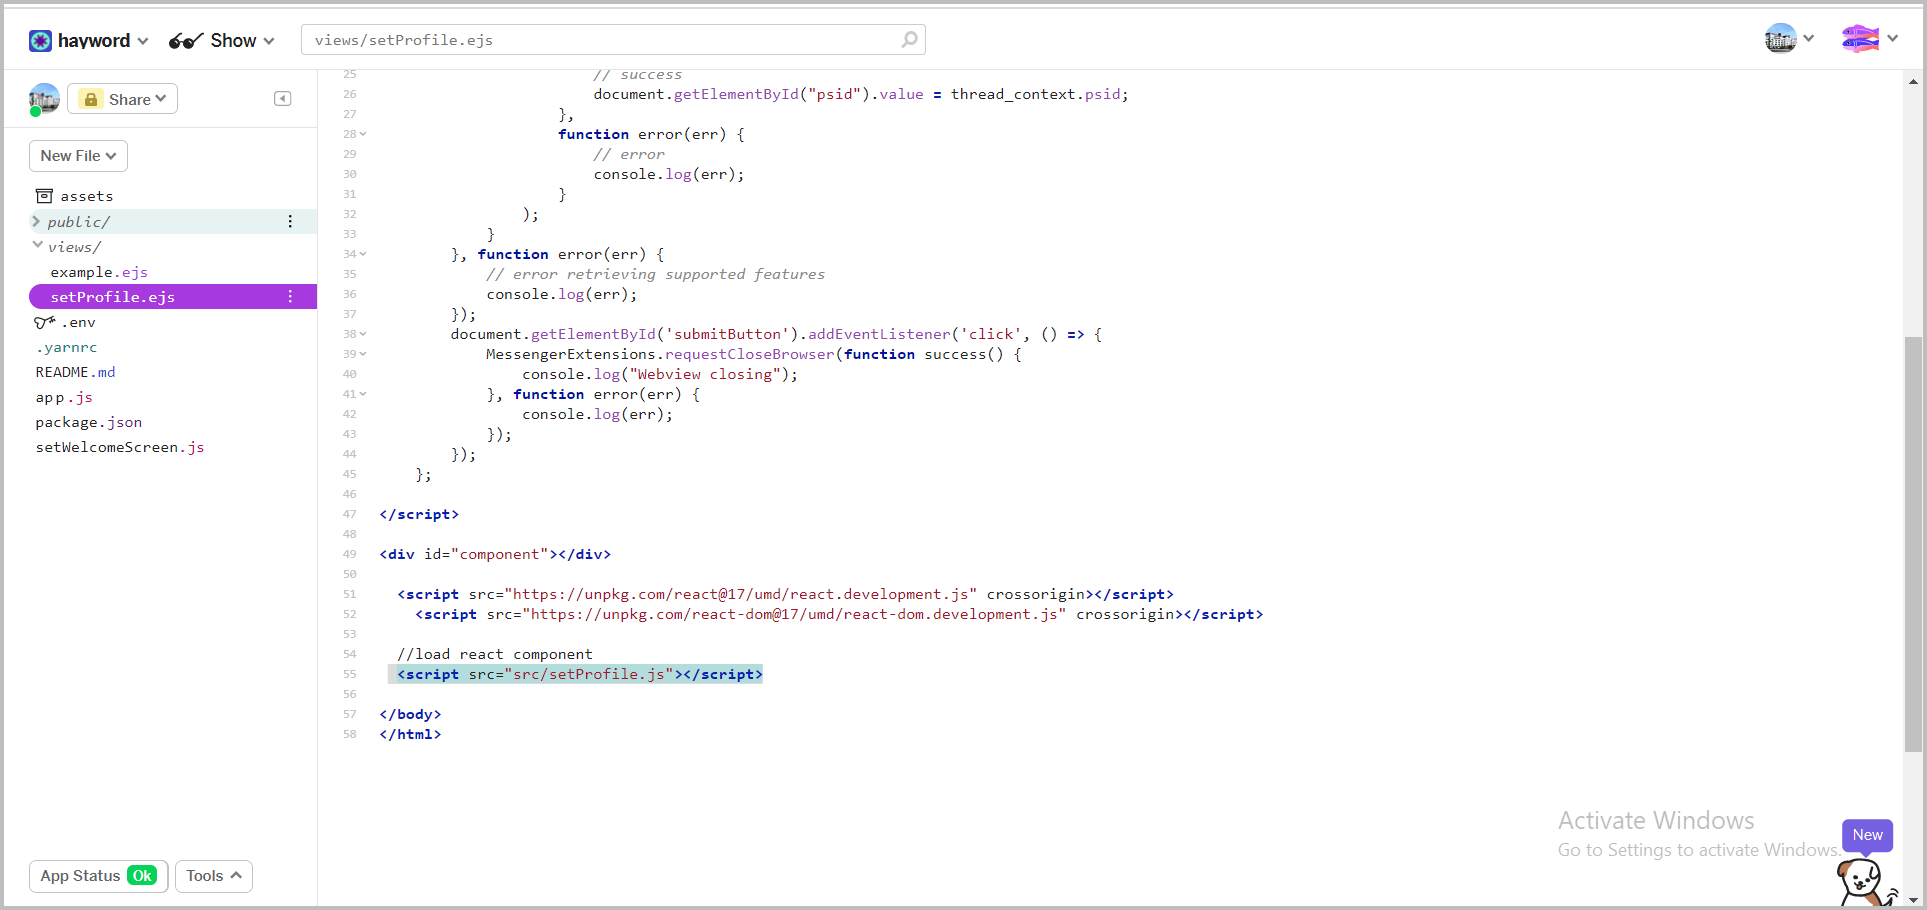
  4. Edit the <script src =" /src/example.js "> </script> section of the views /setProfile.ejs file to be :

    <script src="/src/setProfile.js"></script> //load react component from setProfile.js file
    Show Details

    edit ejs file

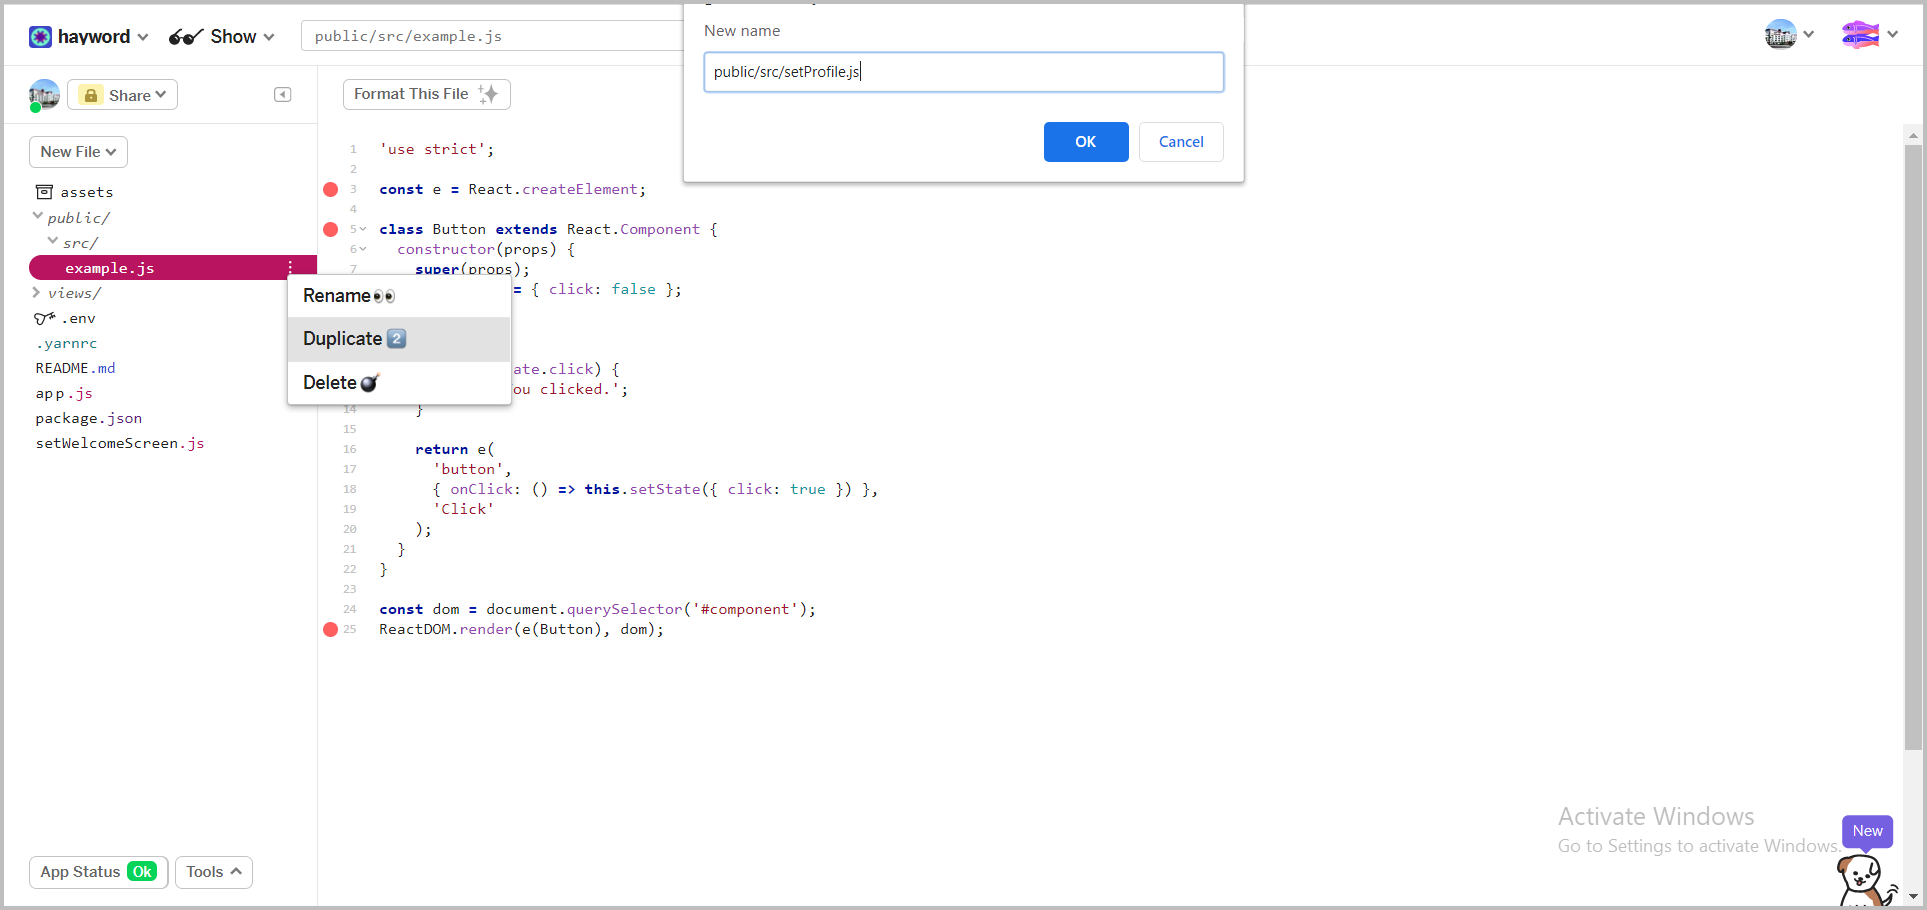
  5. Create a setProfile.js file in the src folder as a react component which will be loaded in the setProfile.ejs file. so it's easier just duplicate the file example.js (right click on the file) then rename it to 'setProfile.js'.

    Show Details

    duplicate js file

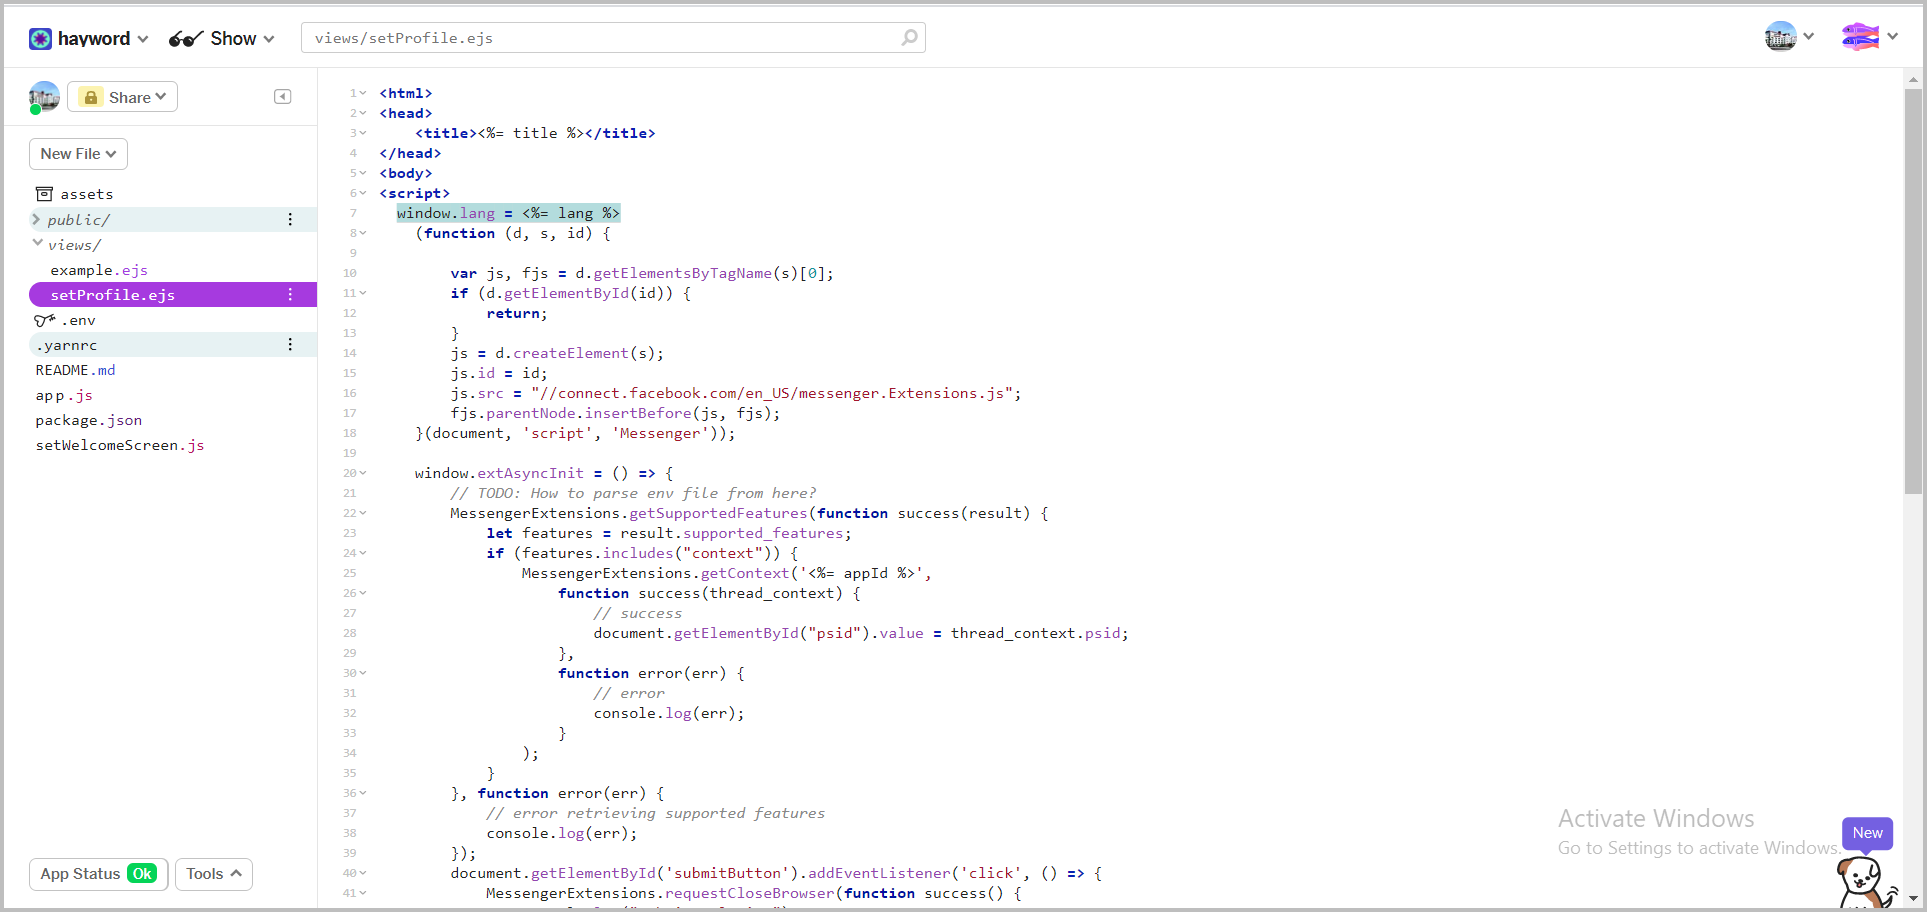
  6. Create a language variable obtained from firebase using window.language in the setProfile.ejs file.

    window.language = '<%= lang %>'
    Show Details

    add wondow lang variable

  7. Create the react form component in the setProfile.js file.

    'use strict';
    const e = React.createElement;
    //create a select input form component
    function FormInput(props) {
    return (
    React.createElement("select", { className: "form-control",onChange: props.handlerLang, value: props.lang , style: { flexGrow: "1", marginTop: '1em'} },
    React.createElement("option", { value: '-' }, "-"),
    React.createElement("option", { value: 'id' }, "Indonesia"),
    React.createElement("option", { value: 'hi' }, "India"),
    React.createElement("option", { value: 'th' }, "Thailand"),
    React.createElement("option", { value: 'en' }, "United States")
    )
    )
    }
    //create a 'Save' component button
    class Button extends React.Component {
    constructor(props) {
    super(props);
    this.submit = this.submit.bind(this);
    }
    //create submit function to update profile
    submit () {
    fetch('https://hayword.glitch.me/setProfile', {
    method: 'POST',
    headers: {
    'Content-Type': 'application/json',
    },
    body: JSON.stringify({id: window.psid, lang: this.props.lang}),
    }).then(res => console.log(res))
    }
    render() {
    return e(
    'button',
    { style:{ marginTop: '1em', width: '100%'},className: "btn btn-primary",onClick: ()=> this.submit },'Save'
    );
    }
    }
    //layout components for input form and the 'Save' button
    class SelectLang extends React.Component {
    constructor(props) {
    super(props);
    this.state = { lang: window.language };
    this.handlerLang = this.handlerLang.bind(this);
    }
    handlerLang (e){
    this.setState({
    lang: e.target.value
    })
    }
    render() {
    return e(
    'div',
    { style: {display: "flex", flexDirection: "column", alignItems: "center",width: "100%"}, className: "container-fluid" },
    React.createElement(FormInput, {lang: this.state.lang,handlerLang: this.handlerLang},null),
    React.createElement(Button, {lang: this.state.lang},null)
    );
    }
    }
    const dom = document.querySelector('#component');
    ReactDOM.render(e(SelectLang), dom);
  8. whitelist the domain so that the webview we create can be accessed on messenger by: open the facebook page (FB page)> page settings> advanced messaging> enter the url of the app to the whitelist domain

    Show Details
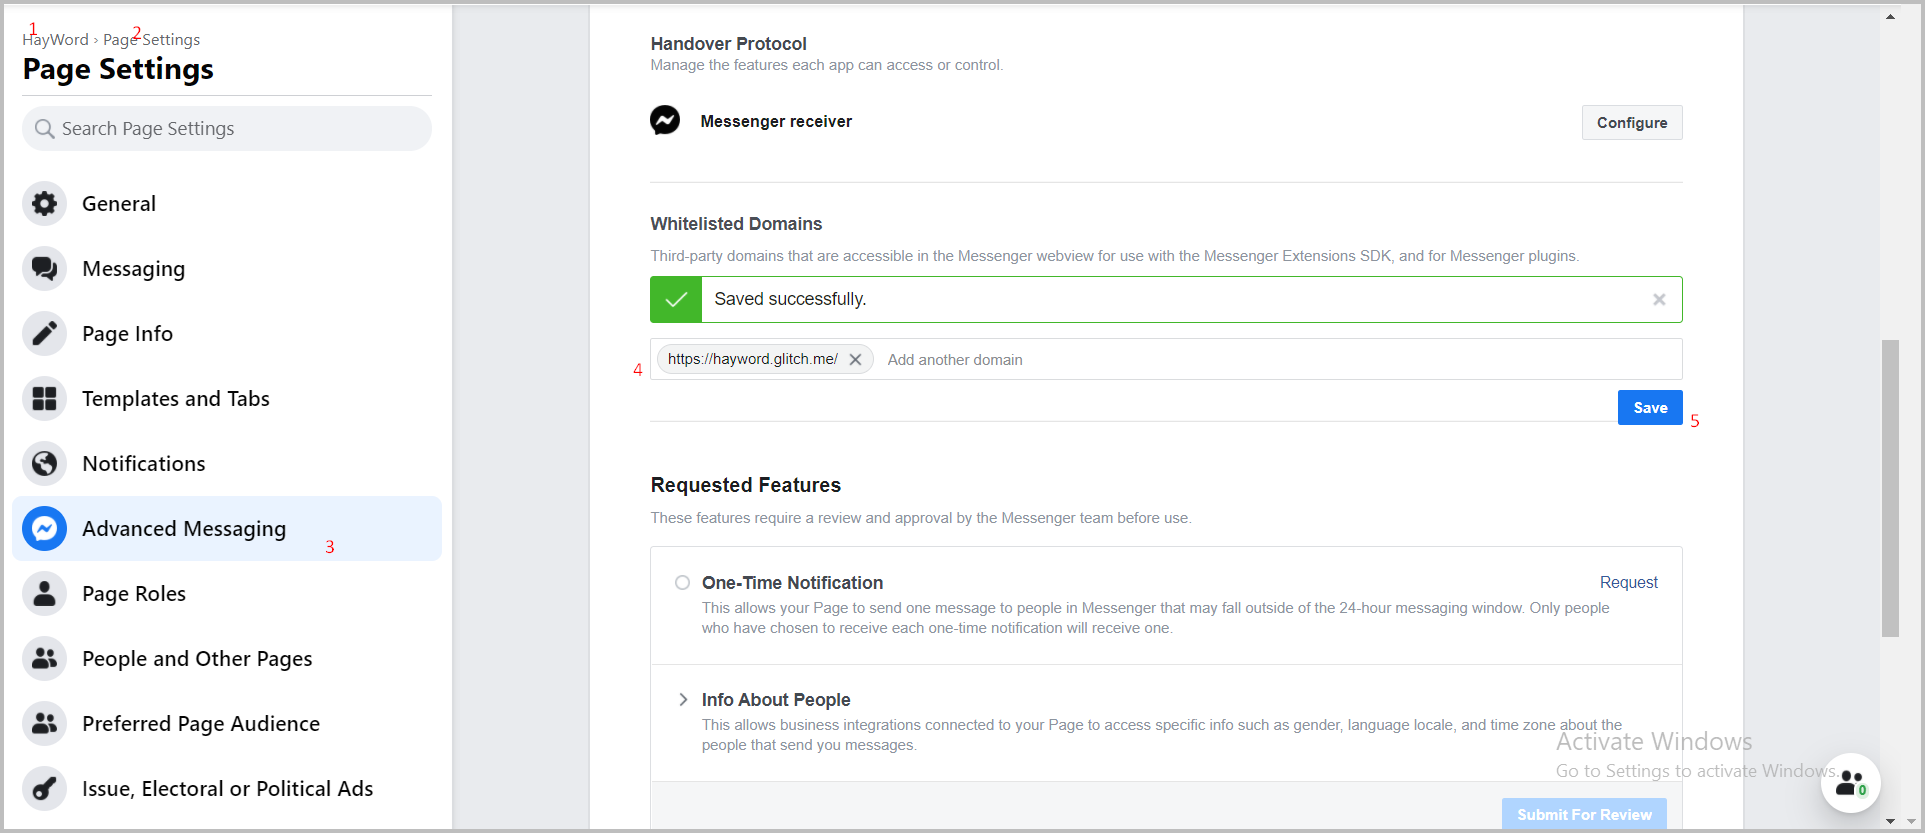
    whitelist domain

Why is it important to create webview? Why React?

It is important because we want the user to input a specific value. In this case, it is the Native Language selection for the translate feature. We don't want user input language that doesn't support by translate service provider partner. We use React because it's easy to handle data (user's language) between components through state and props.

Saving Data to Firebase#

  1. Create the post /setProfile route to store updated user profile data to firebase.
    app.post('/setProfile', (req, res) => {
    //update user data (language) to firebase
    db.doc(`users/${req.body.id}`).update({
    language: `${req.body.lang}`
    }).then(function() {
    //sends a message to the user that the data has been saved successfully
    callSendAPI(req.body.id, {
    text: 'Your Profile has Updated' })
    res.status(200).end()
    });
    }
    );

Creating a Webview Url Button#

Now we are going to make our application reply to the message with the webview url button template when the user first interacts with our application (Get Started Button), previously we have set the postback for getting started is 'MULAI'.

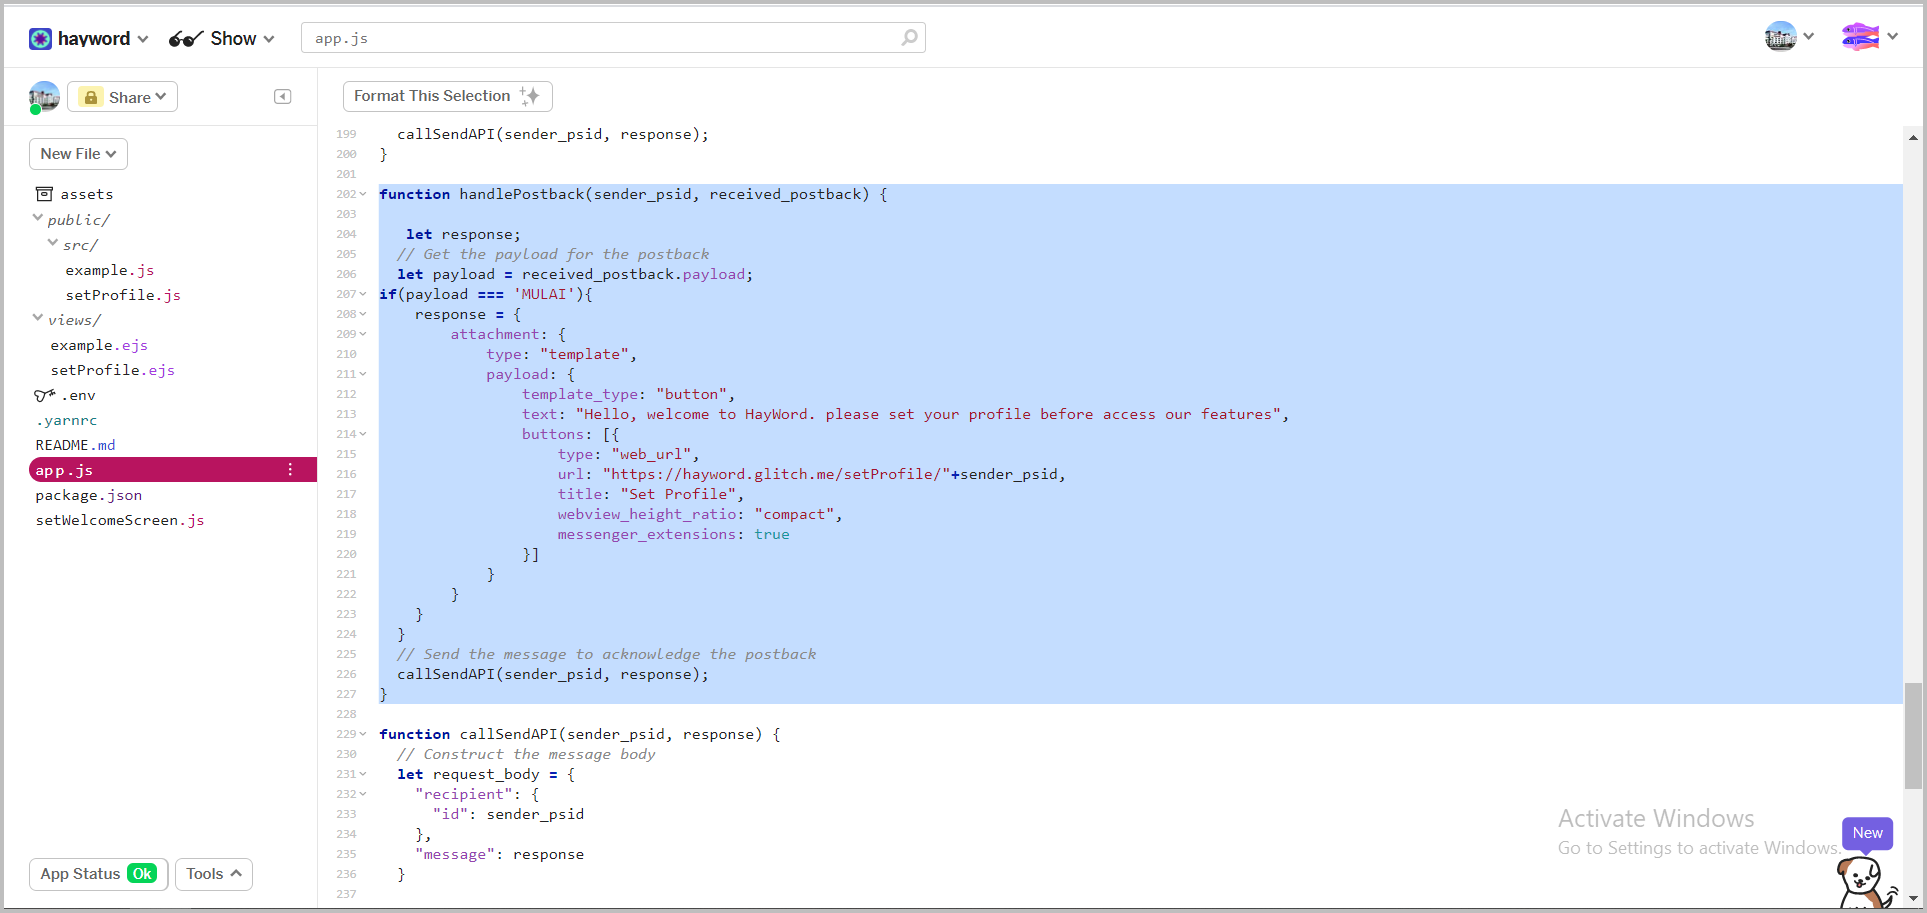
  1. Make a condition if there is a message with the postback 'MULAI', then we will reply with the webview url button template.

    //function for postback type message management
    function handlePostback(sender_psid, received_postback) {
    let response;
    // get payload postback
    let payload = received_postback.payload;
    //check whether the postback payload is the same as 'MULAI' (user clicks the Get Started Button)
    if(payload === 'MULAI'){
    //provide a response template button
    response = {
    attachment: {
    type: "template",
    payload: {
    template_type: "button",
    text: "Hello, welcome to HayWord. please set your profile before access our features",
    buttons: [{
    type: "web_url",
    url: "https://hayword.glitch.me/setProfile/"+sender_psid,
    title: "Set Profile",
    webview_height_ratio: "compact",
    messenger_extensions: true
    }]
    }
    }
    }
    }
    // send a message with the response that we created above
    callSendAPI(sender_psid, response);
    }
    Show Details

    button url